Once you installed Vidello on your computer and logged in, you need to connect your account with AWS.
Why AWS?
Amazon AWS is one of the biggest & best storage & content-distributing platforms online.
Why do I need to connect with AWS?
By connecting Vidello with AWS, every time you upload a video into Vidello, we send it directly to your AWS account, so all your videos are hosted on your end, keeping costs low & allowing you to be fully in control of your content.
In case that you have existing AWS account, you can LOG IN HERE
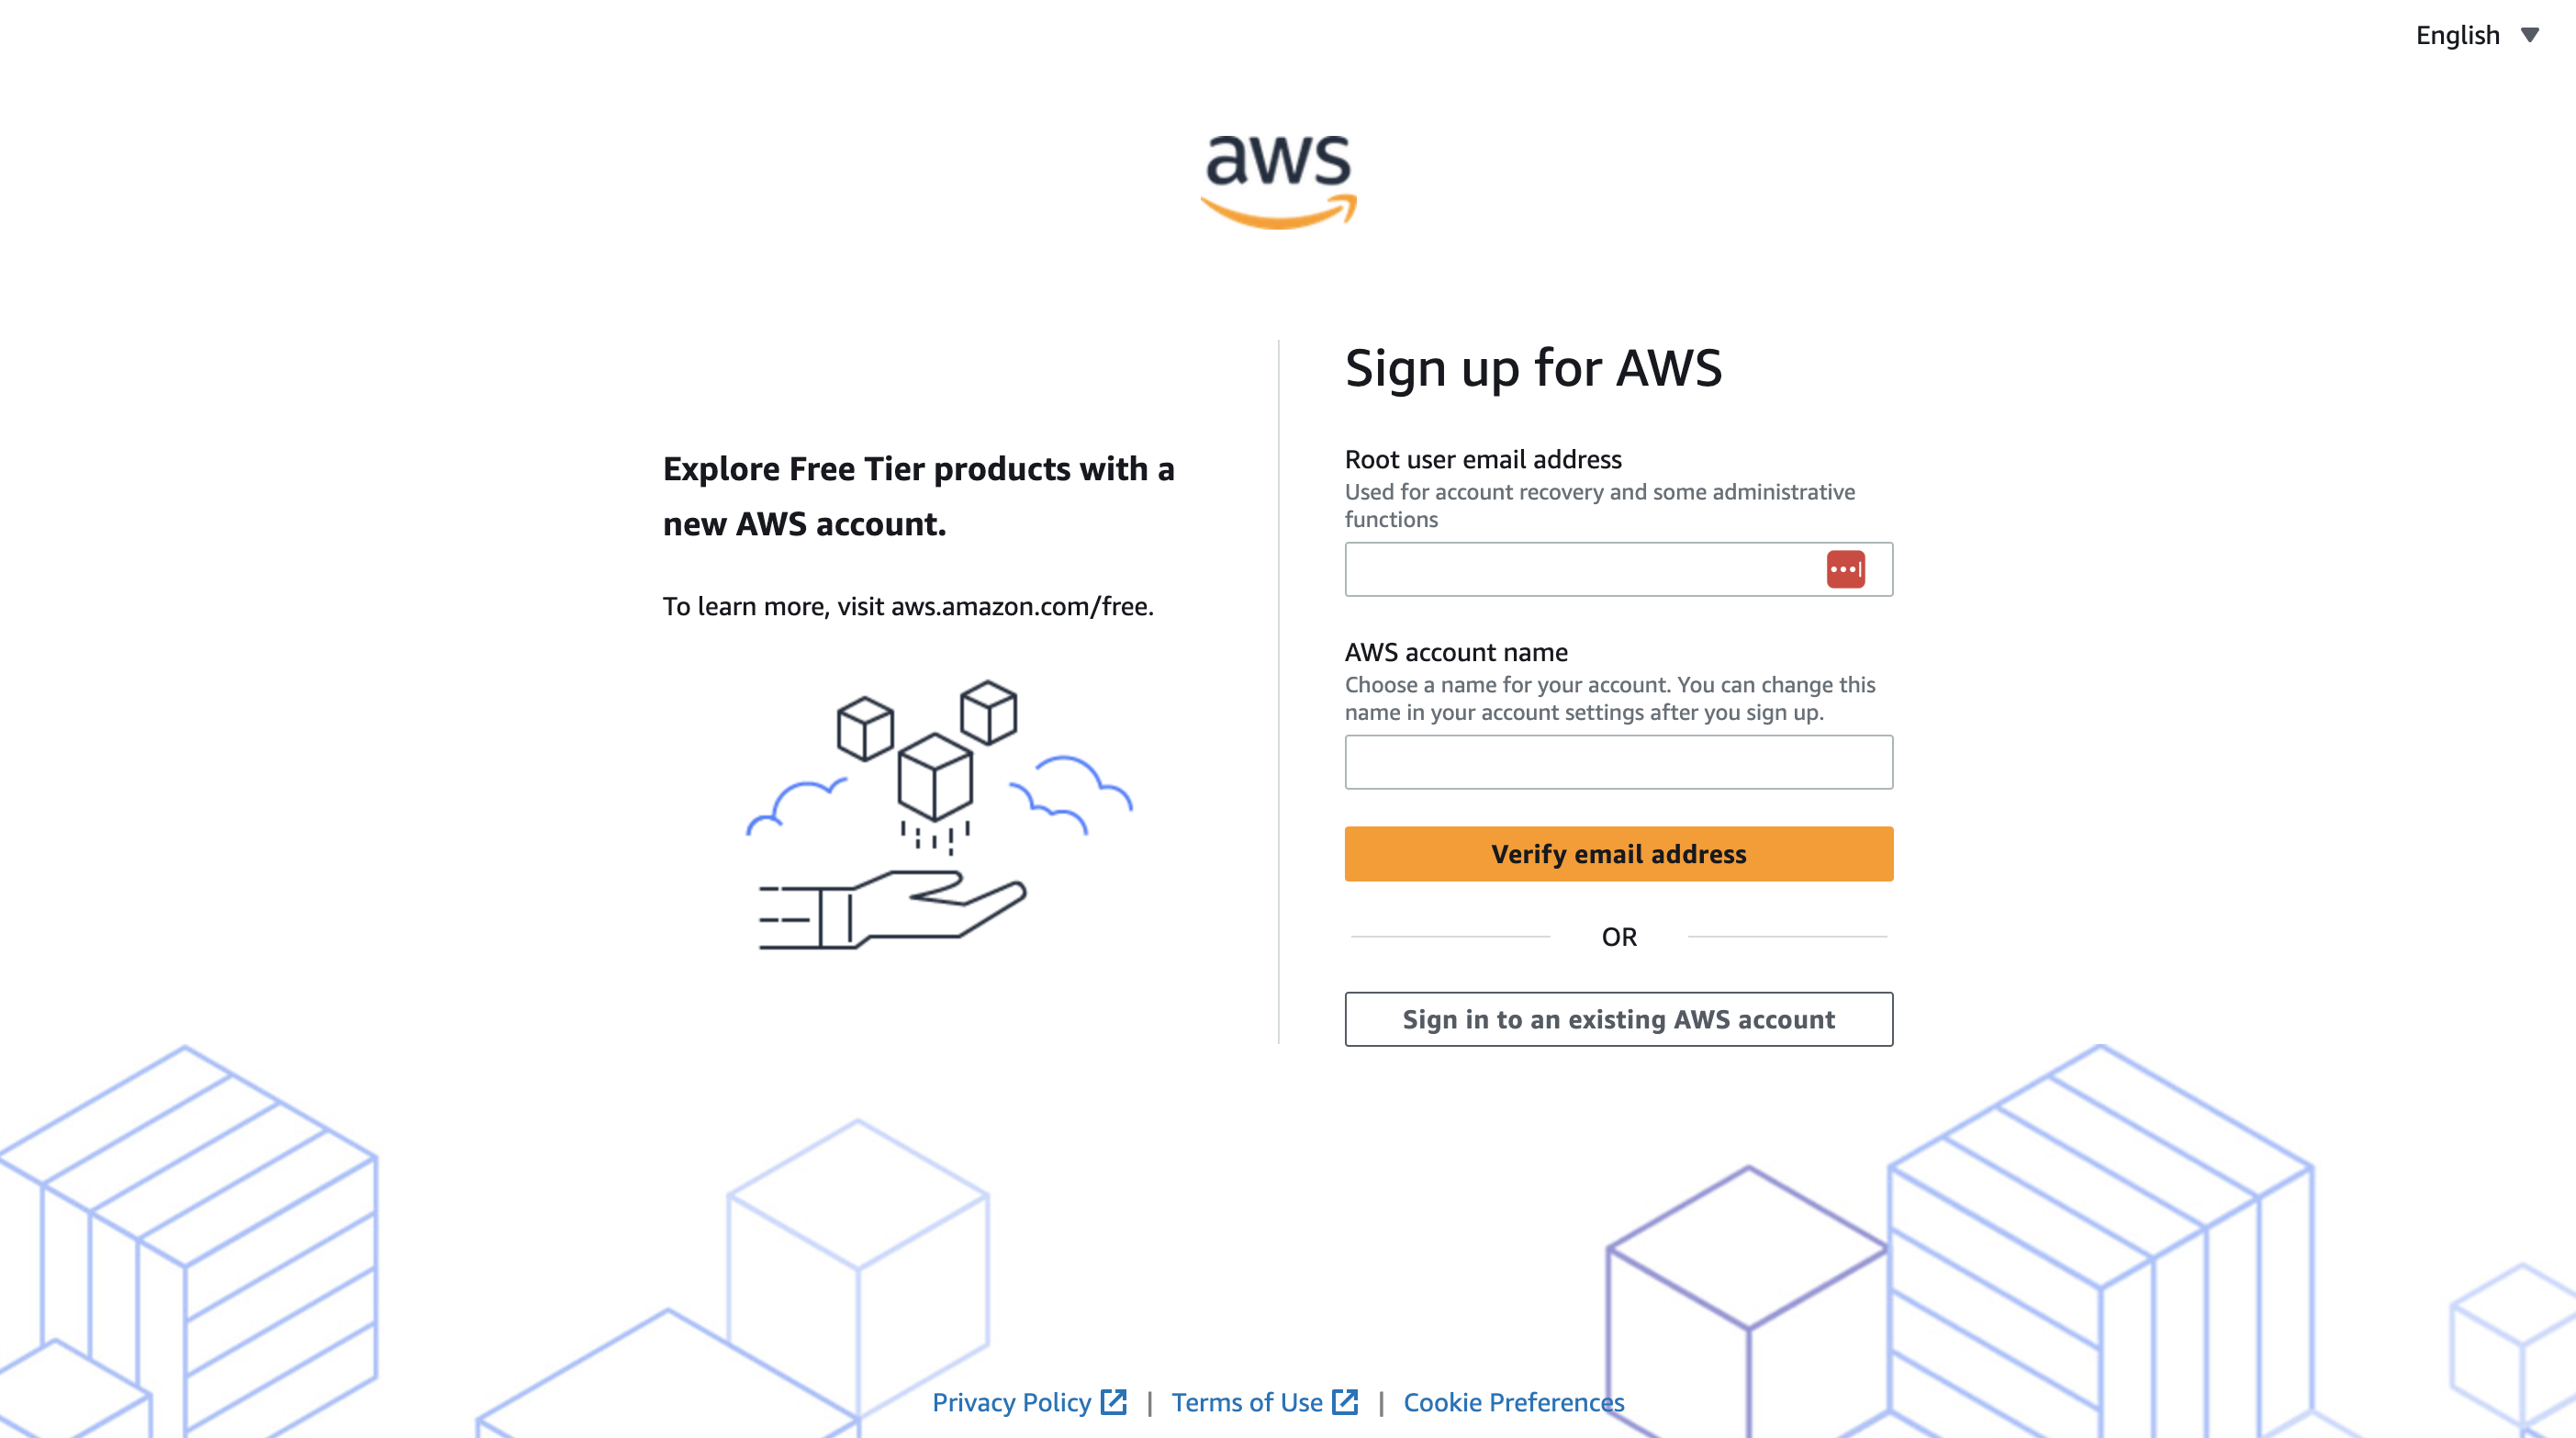
or SIGN UP HERE
1) If you start from scratch, then fill in your details. Then, you will receive a verification email (check your spam folder as well).
In the next steps, AWS will require details about you.
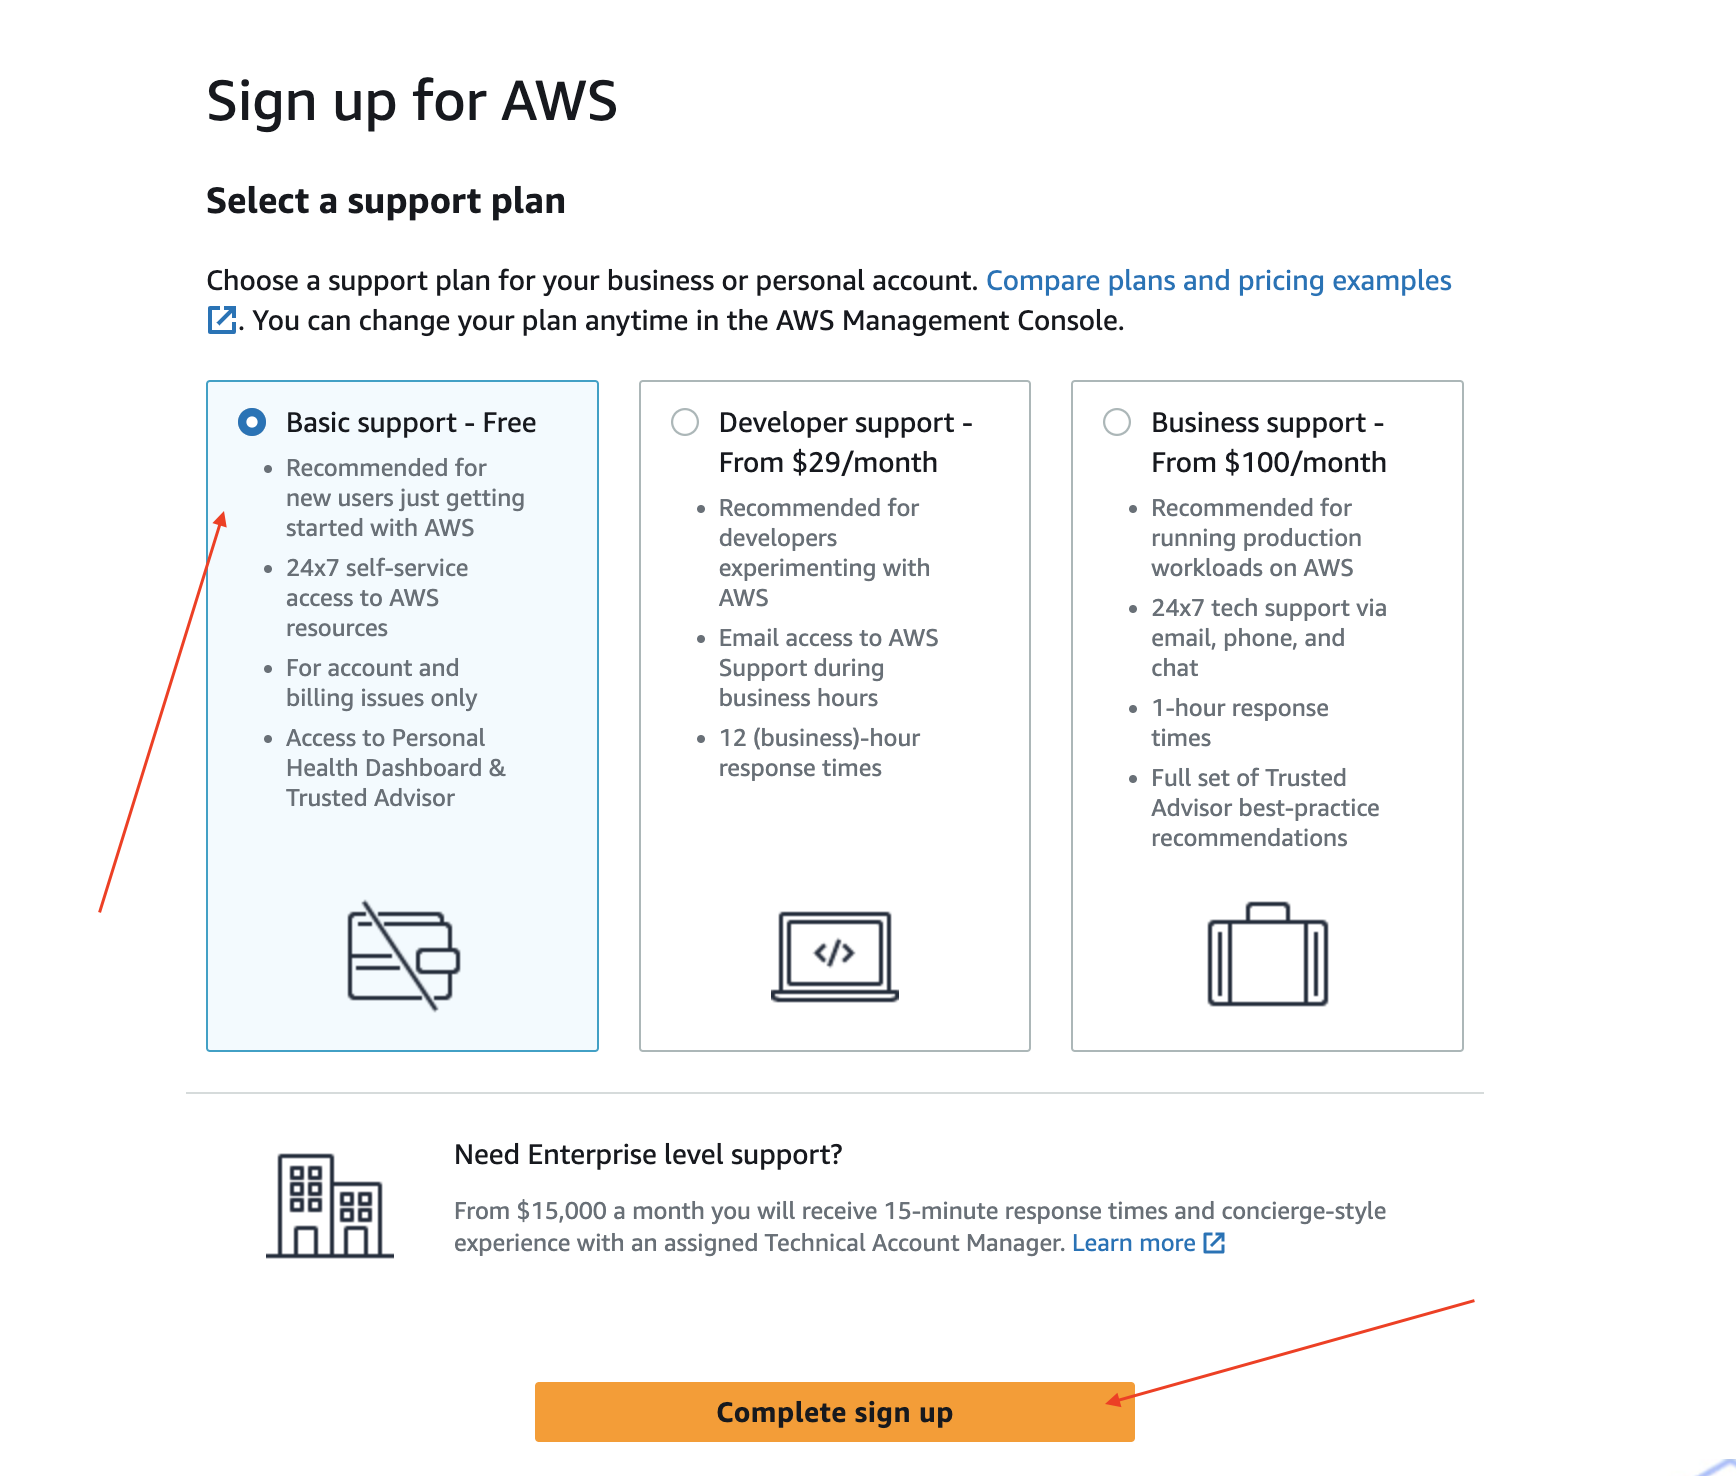
2) Then, AWS will ask you to select a support plan. Pick up "Basic support - Free".
Complete the process and click on "Go to AWS" button
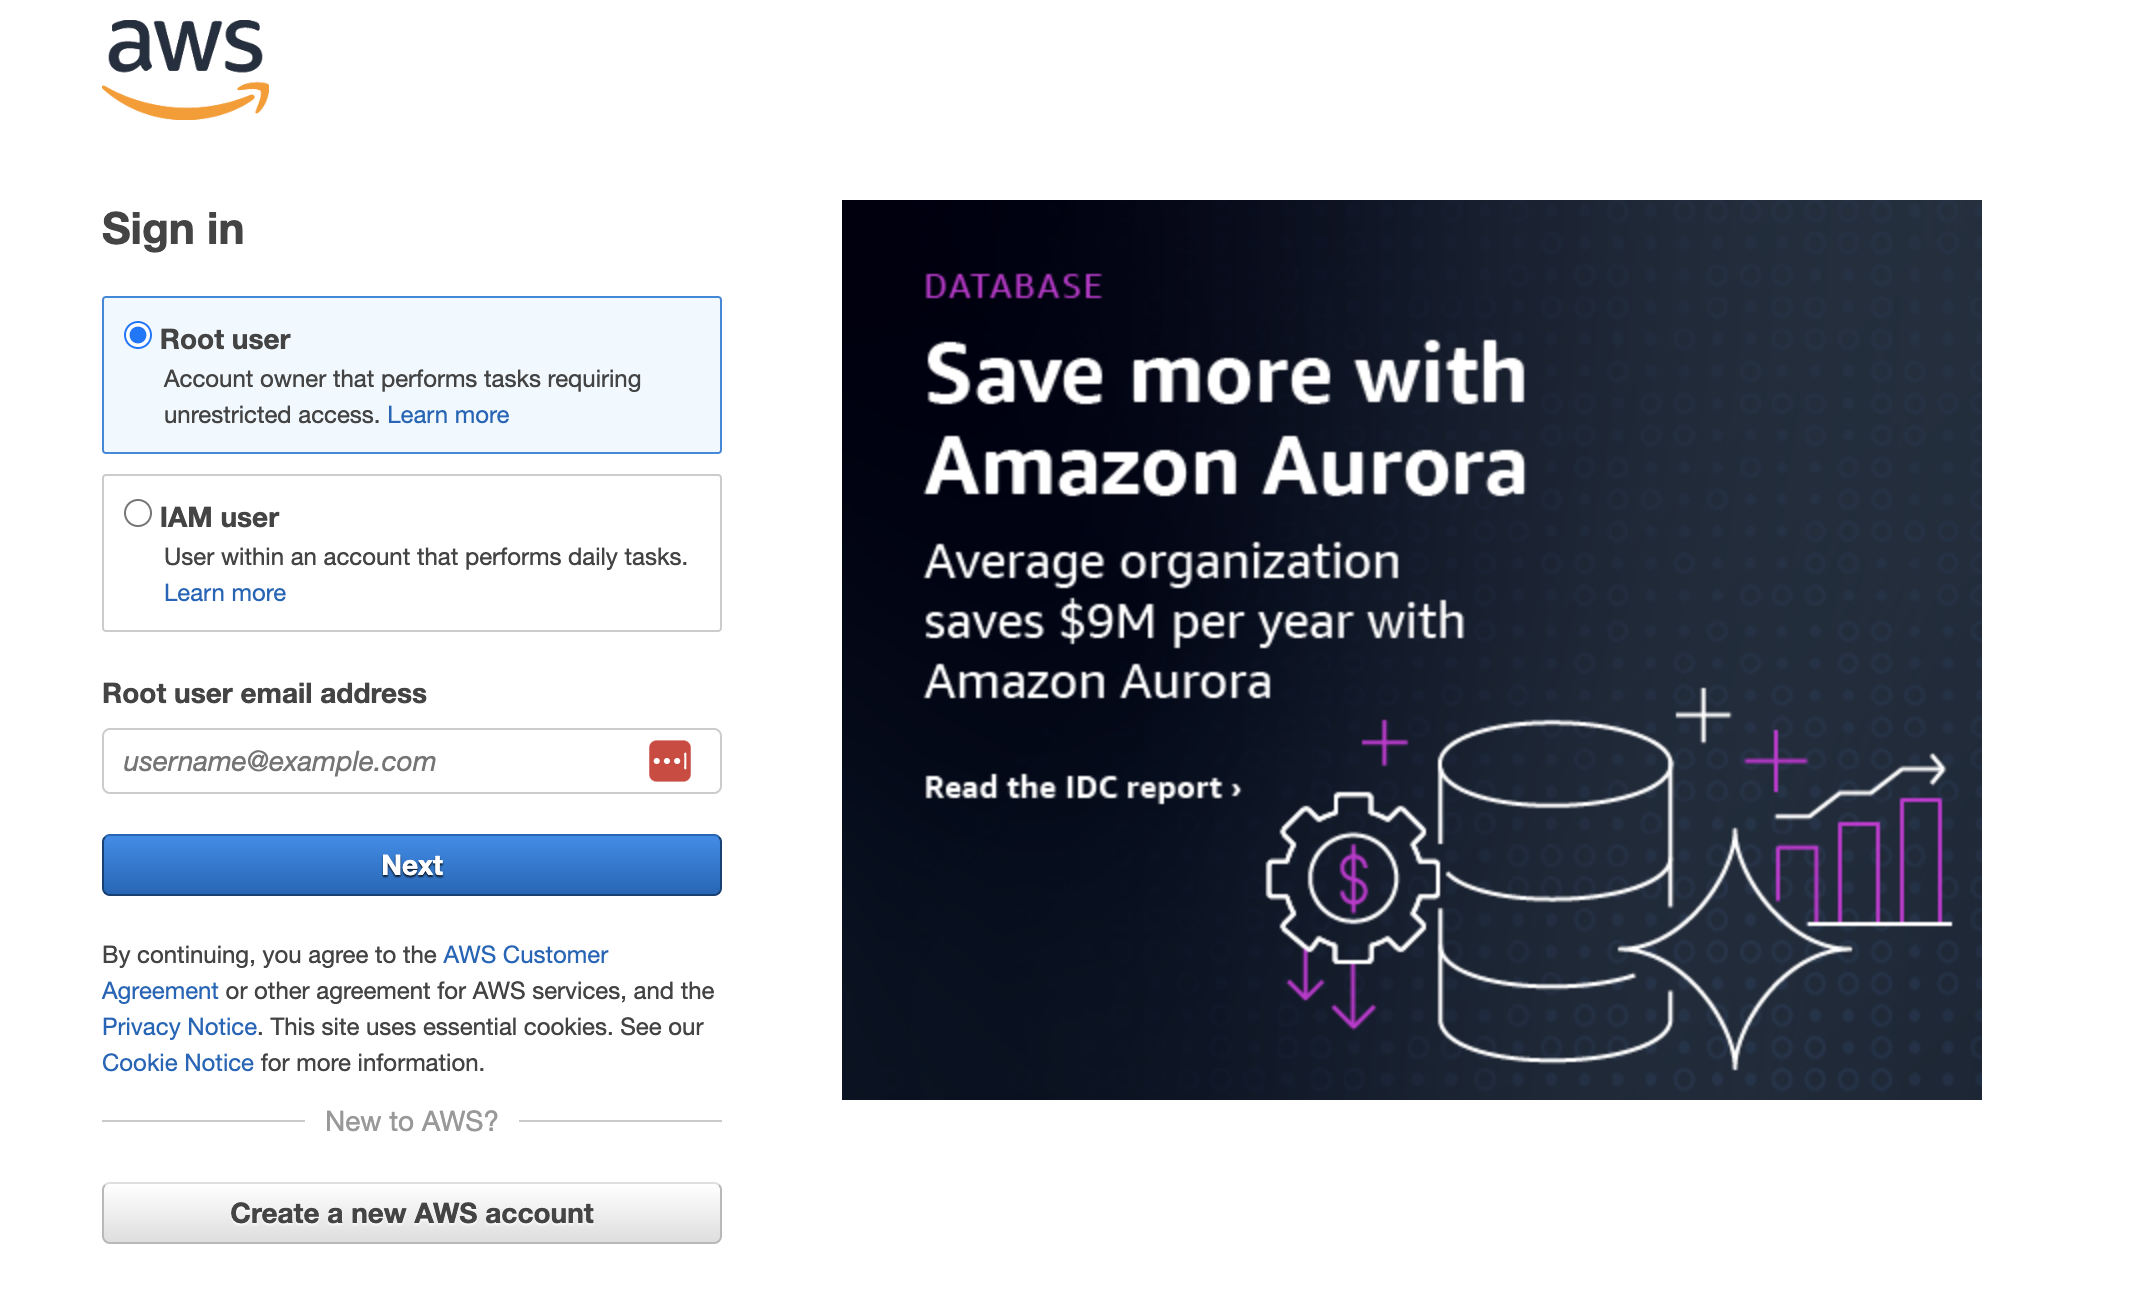
3) Sign in as a ROOT USER
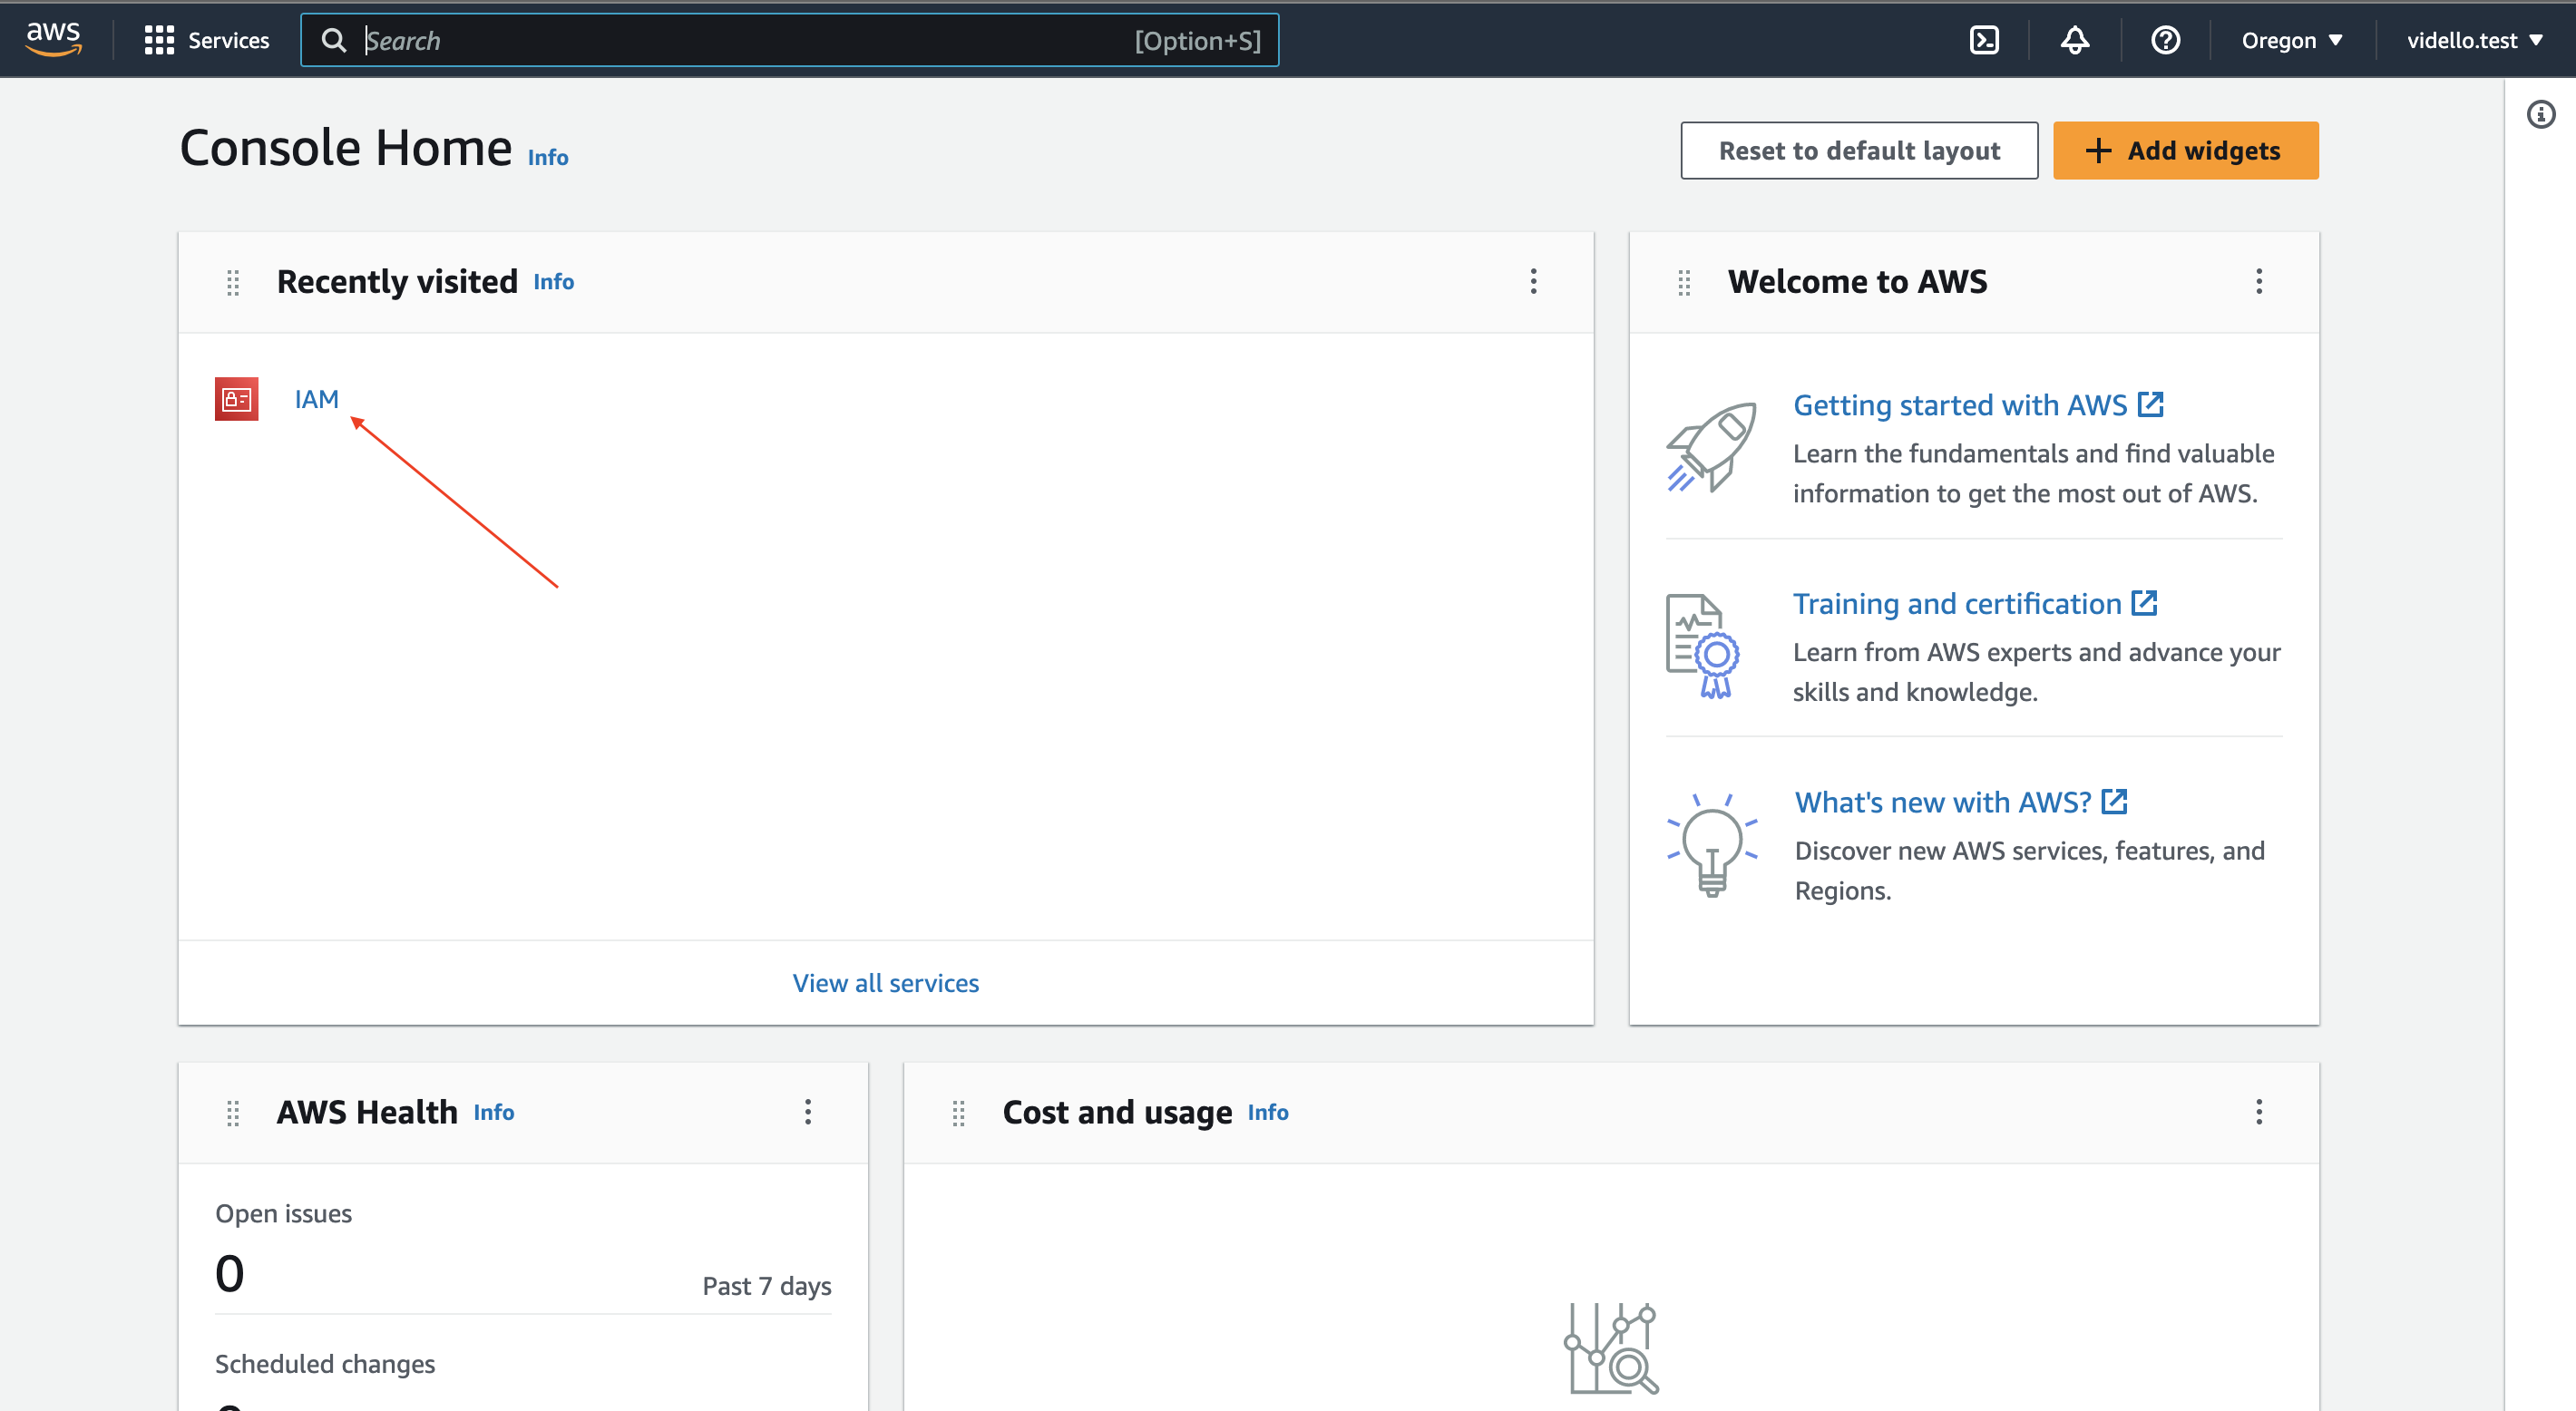
4) Now, let's the party begin! But do not worry ;)
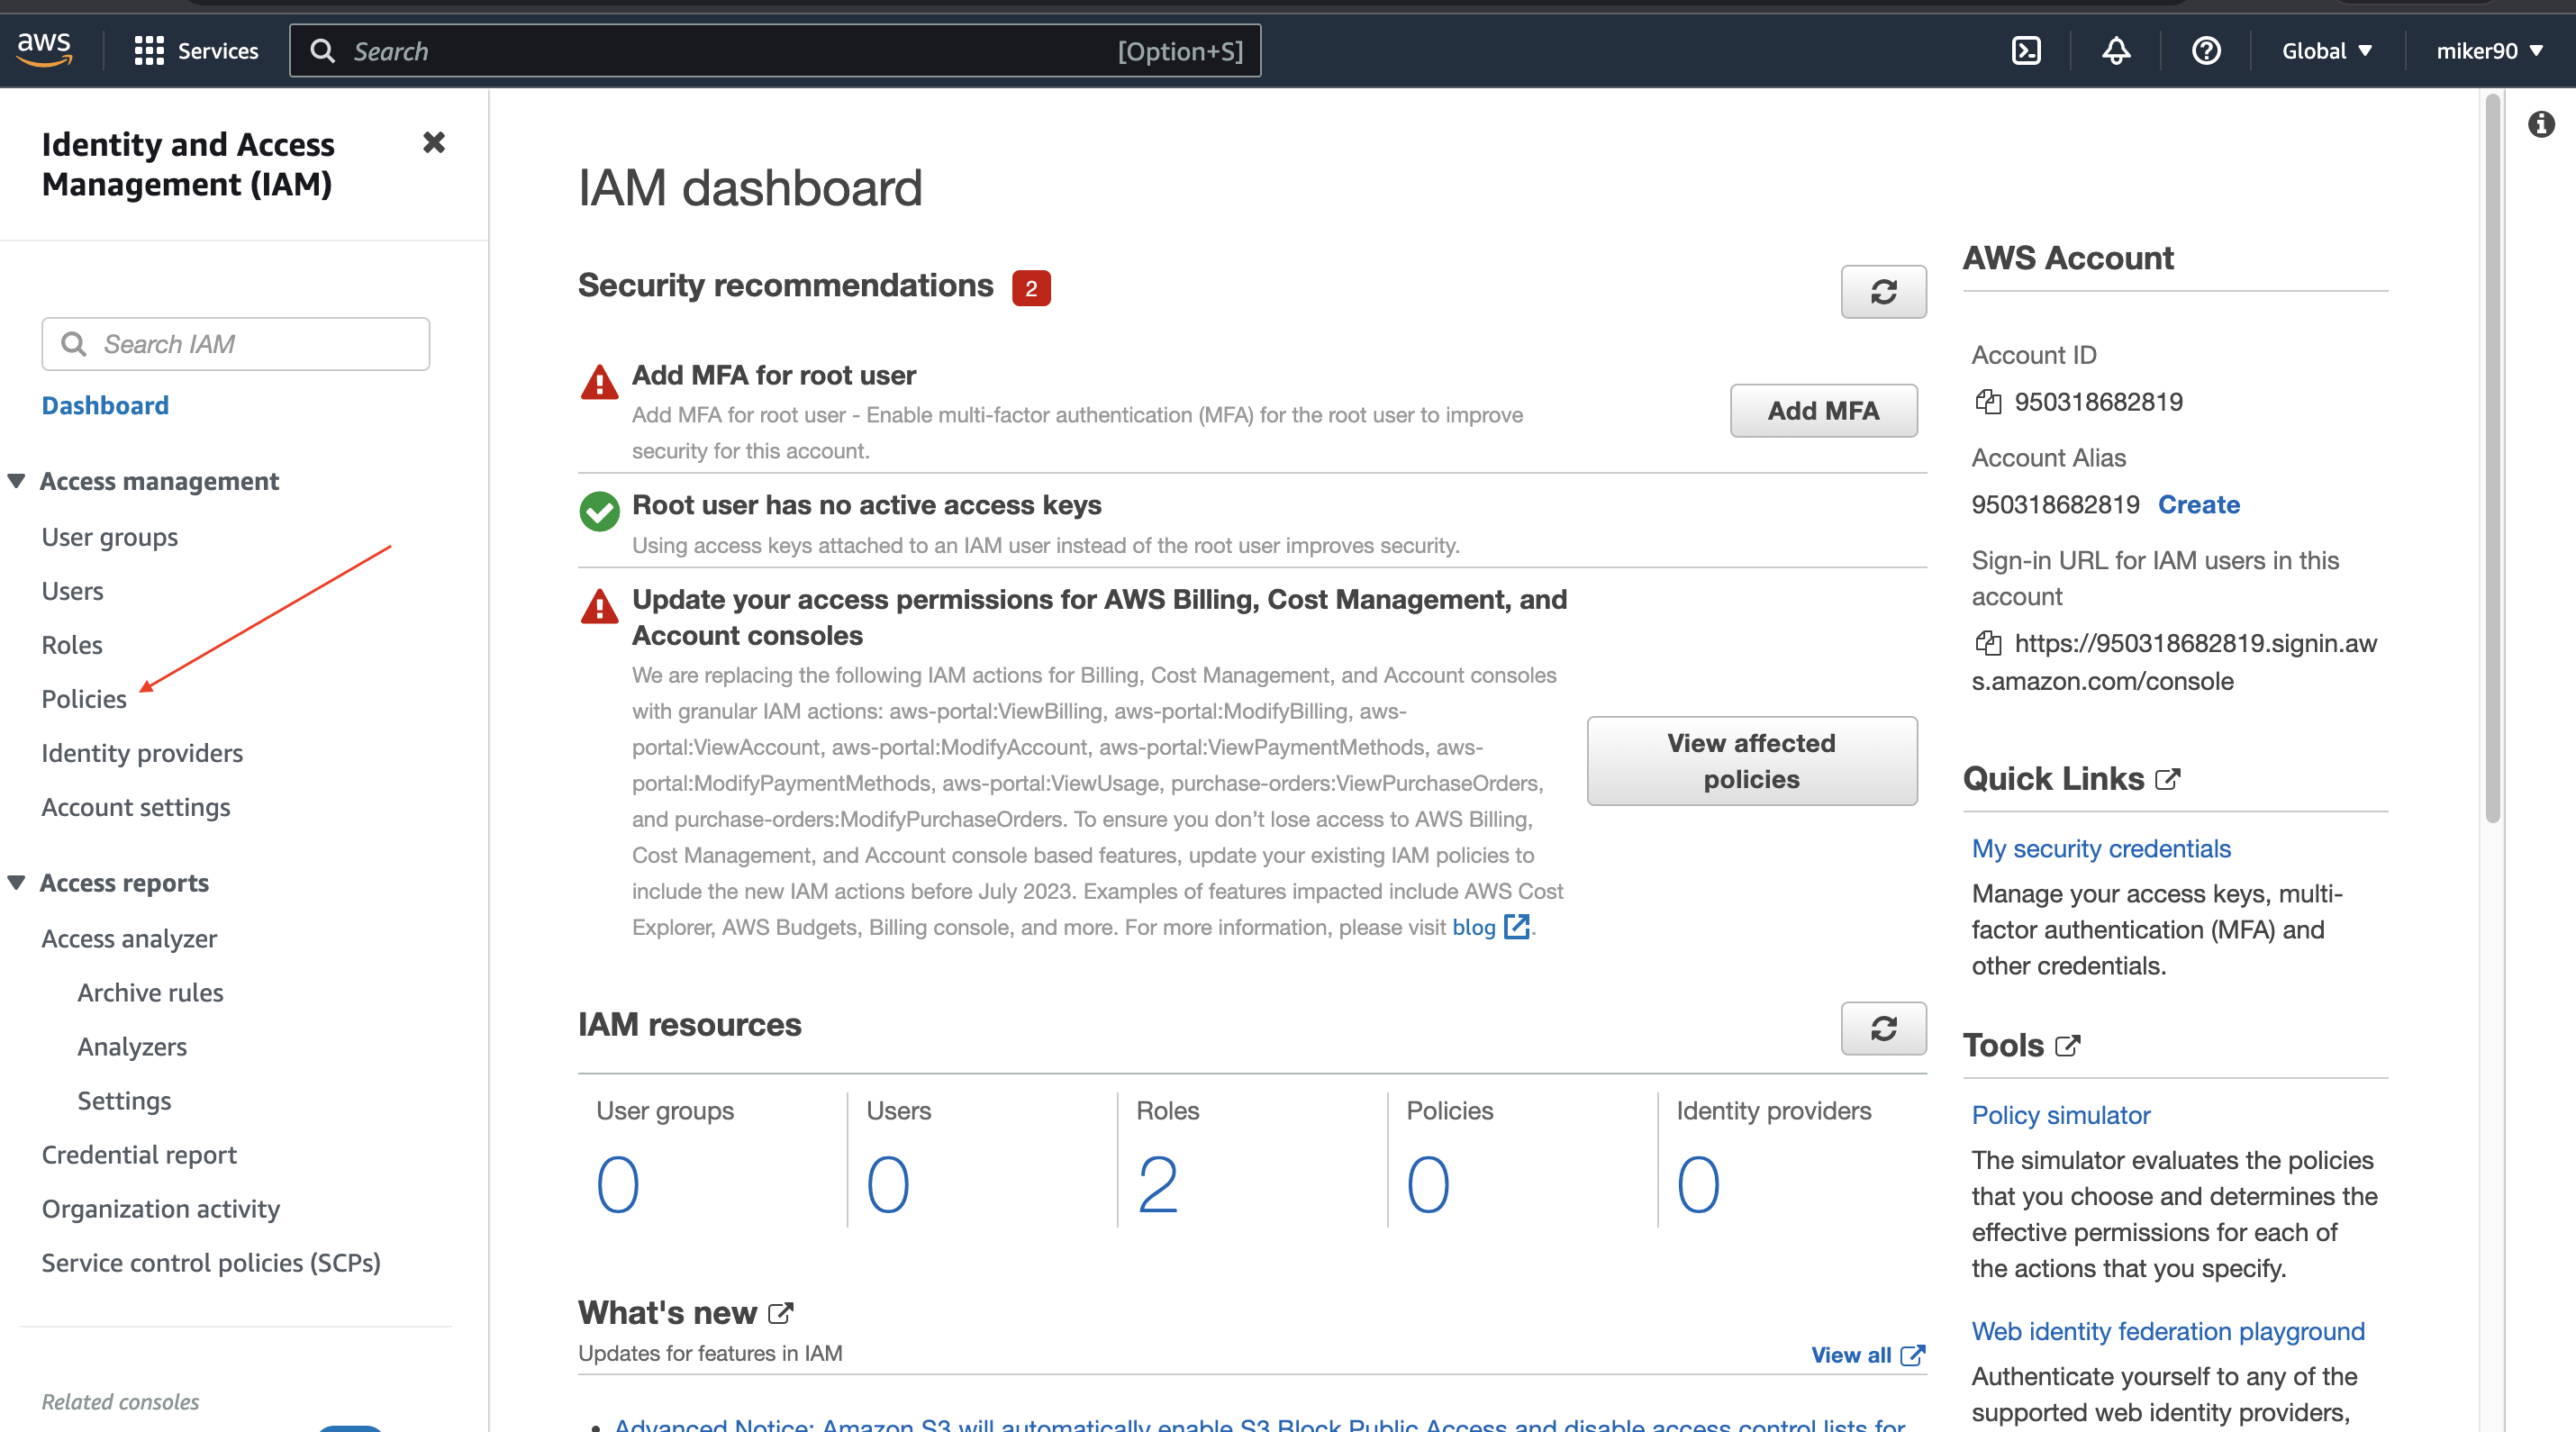
Ok, click on "IAM"
5)
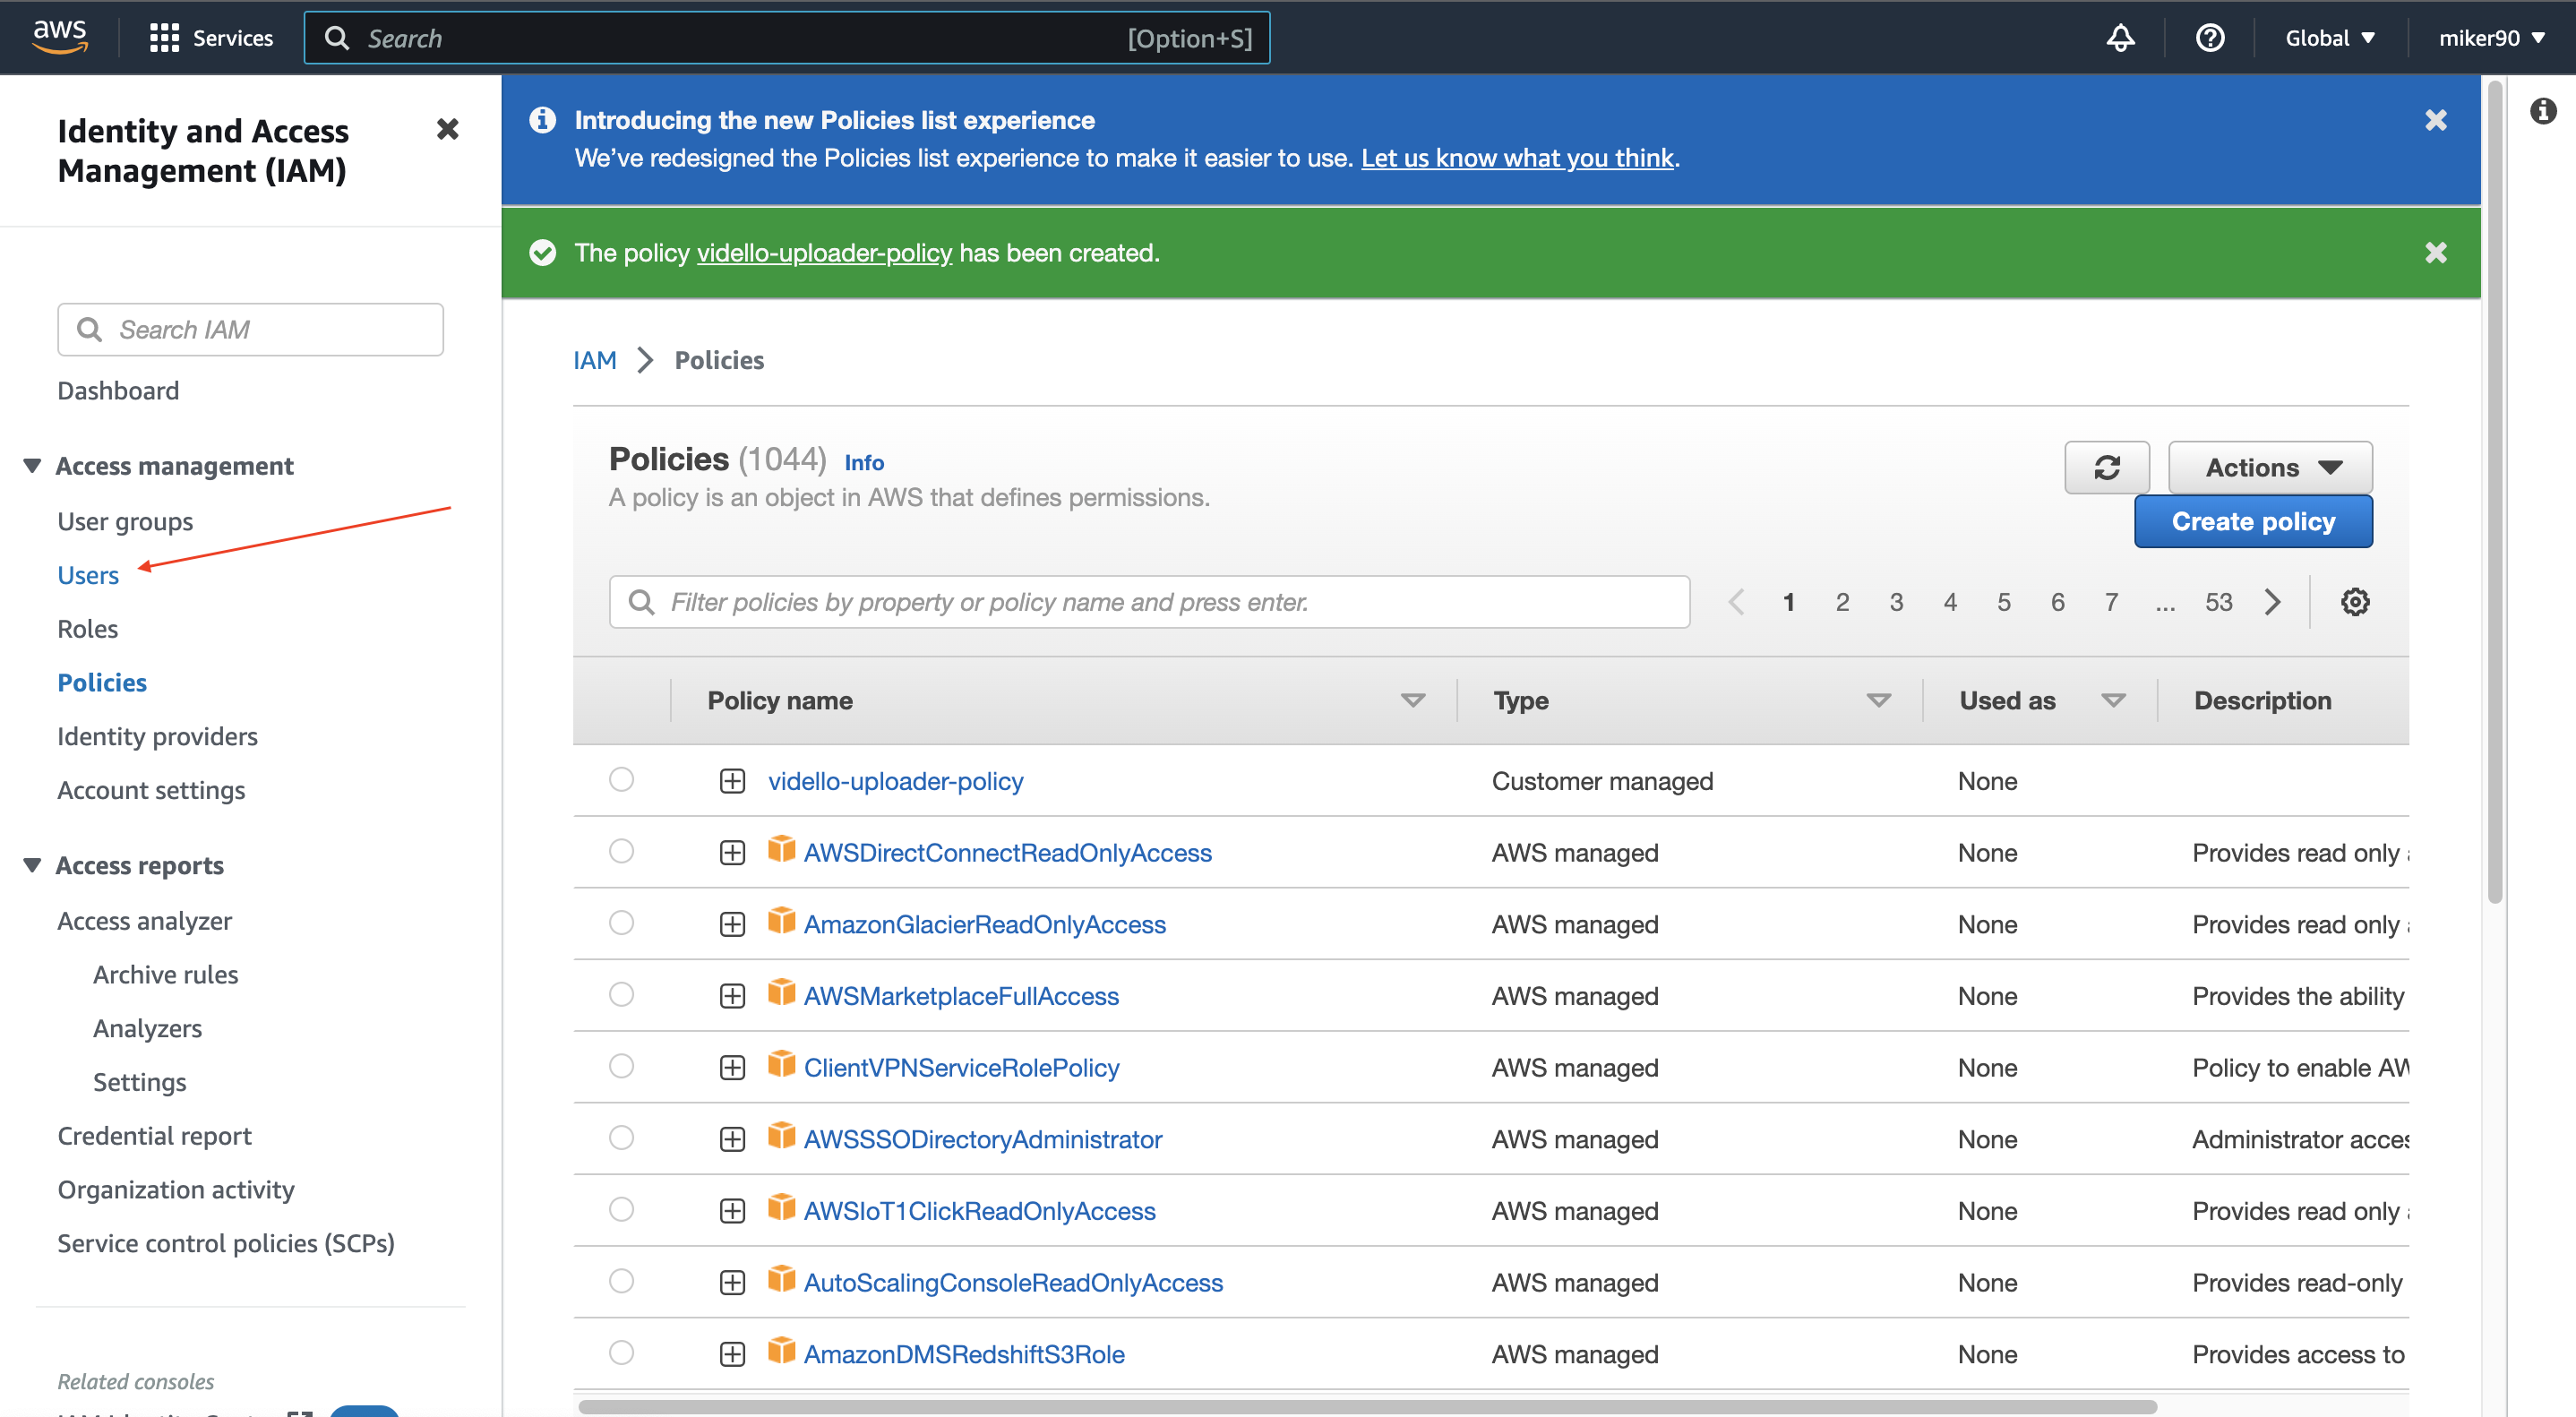
Then, click on "Policies"
6)
Wow, what next?
Click on "Create policy"
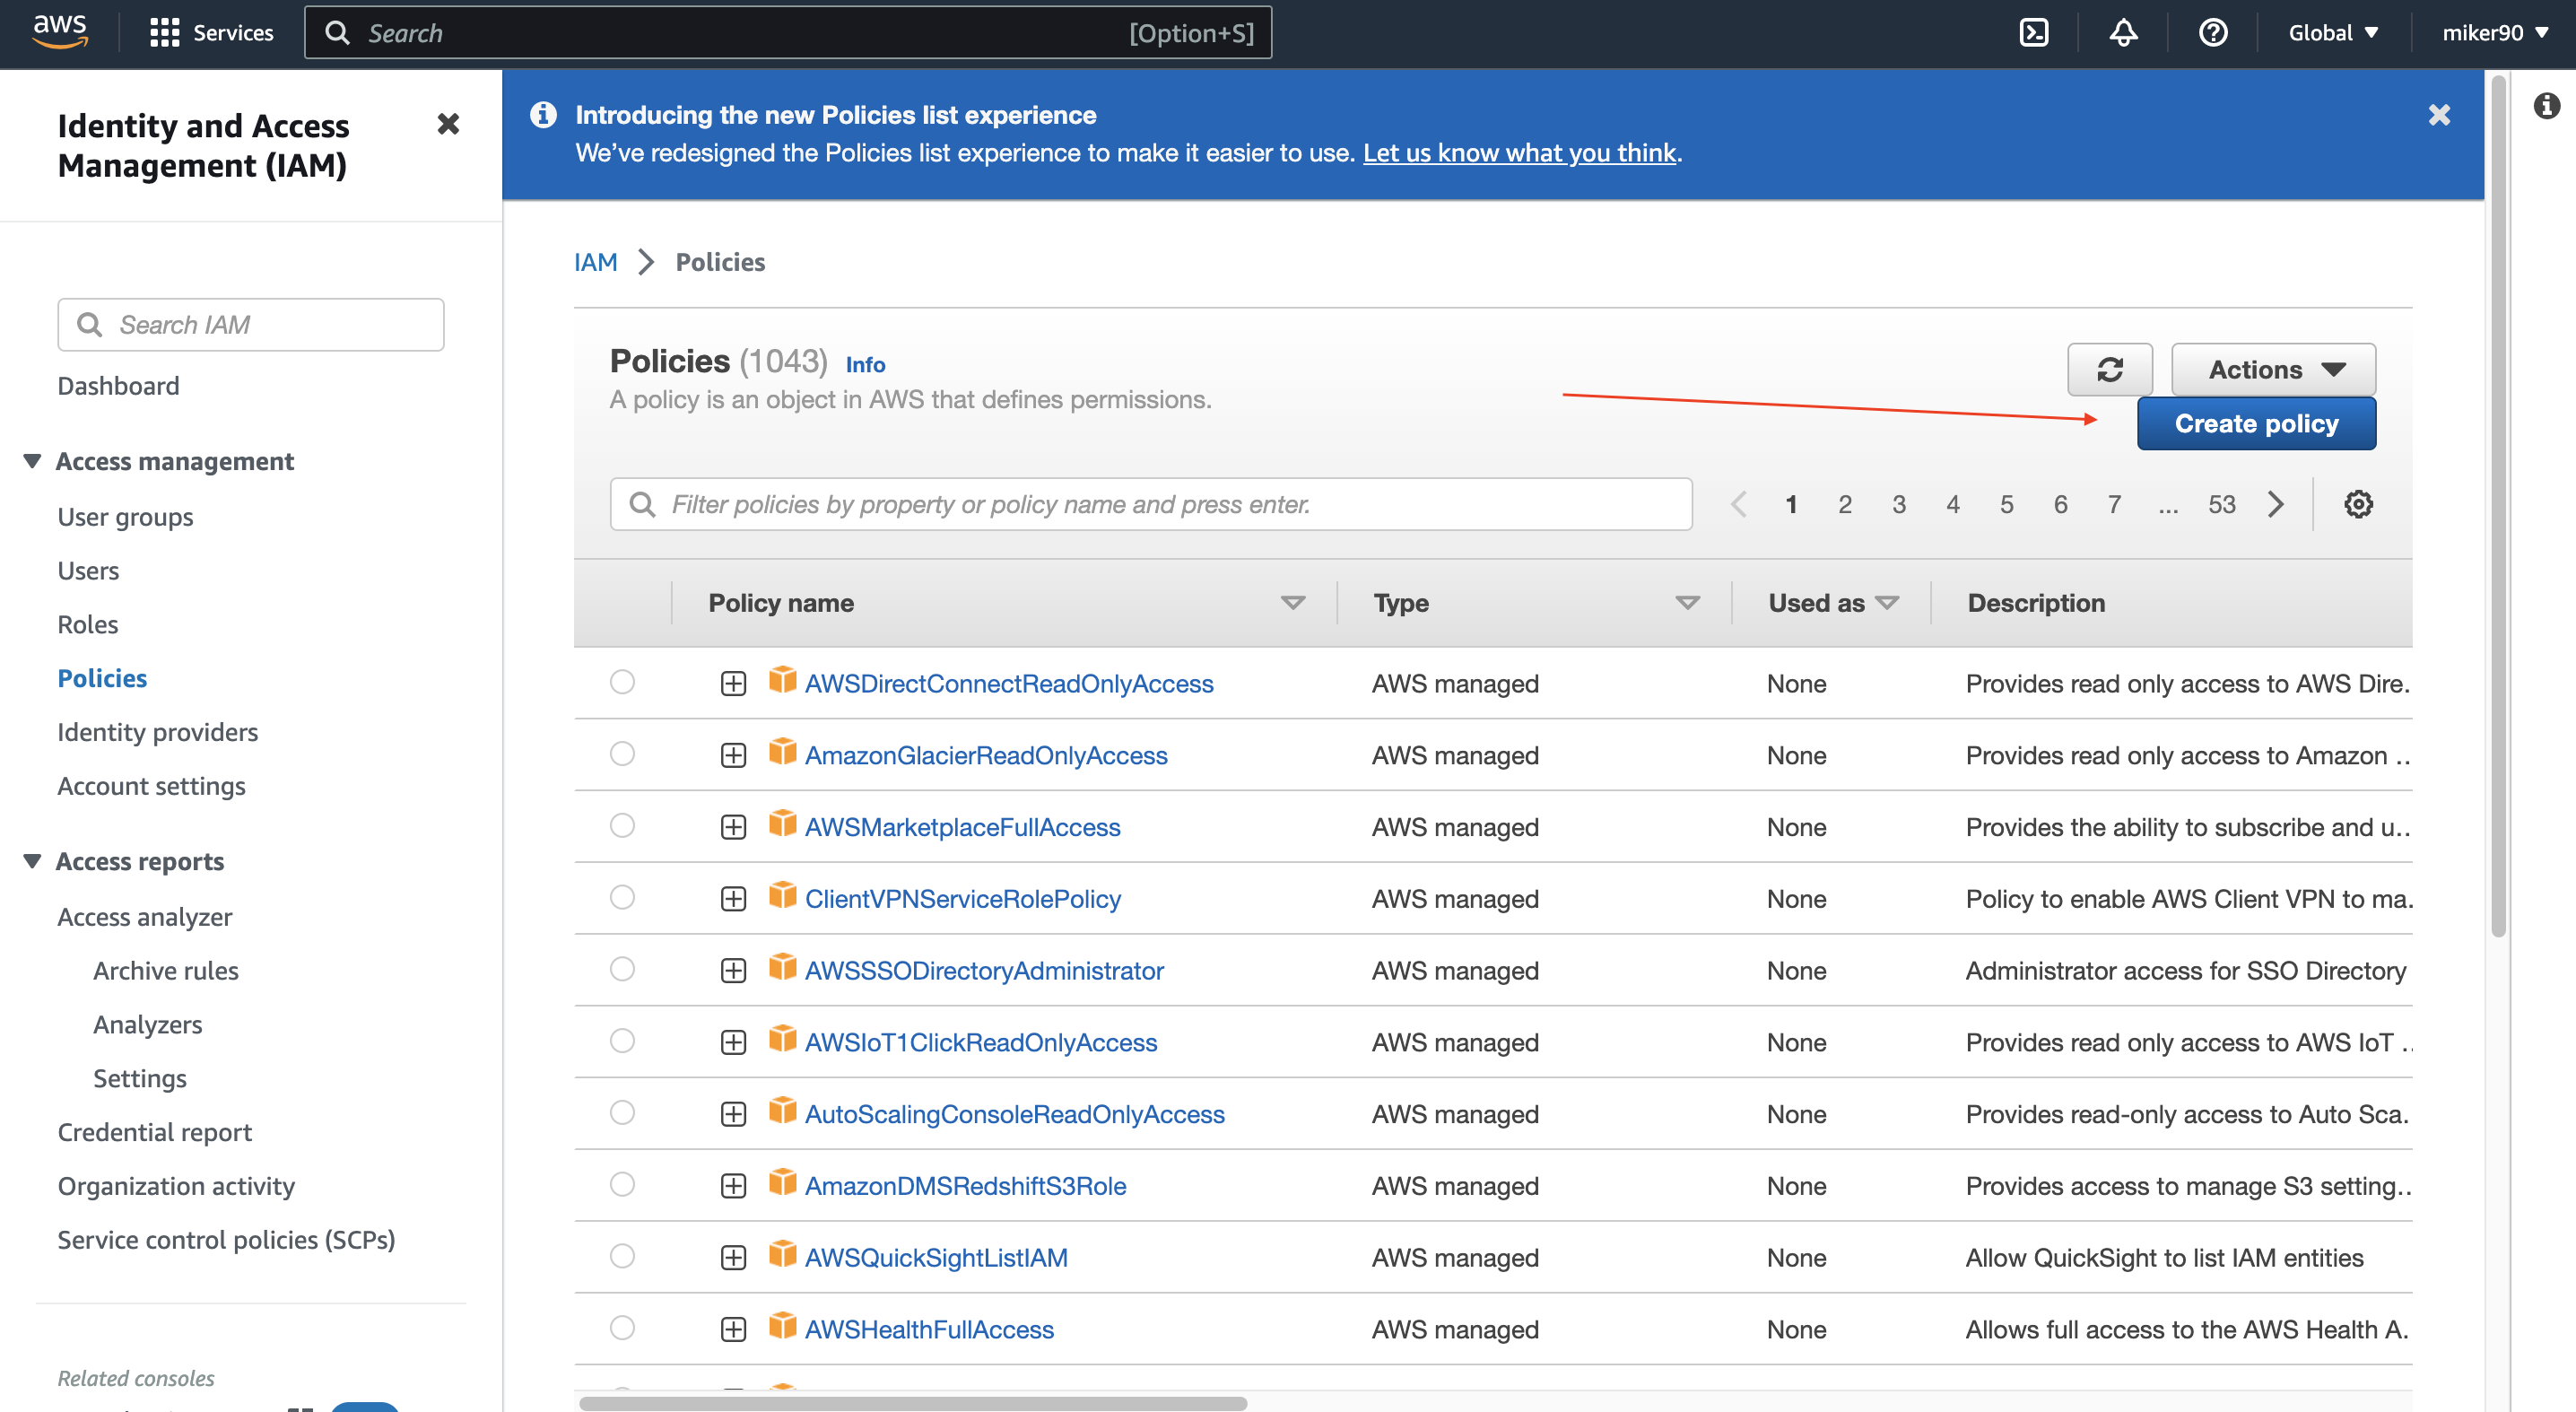
7)
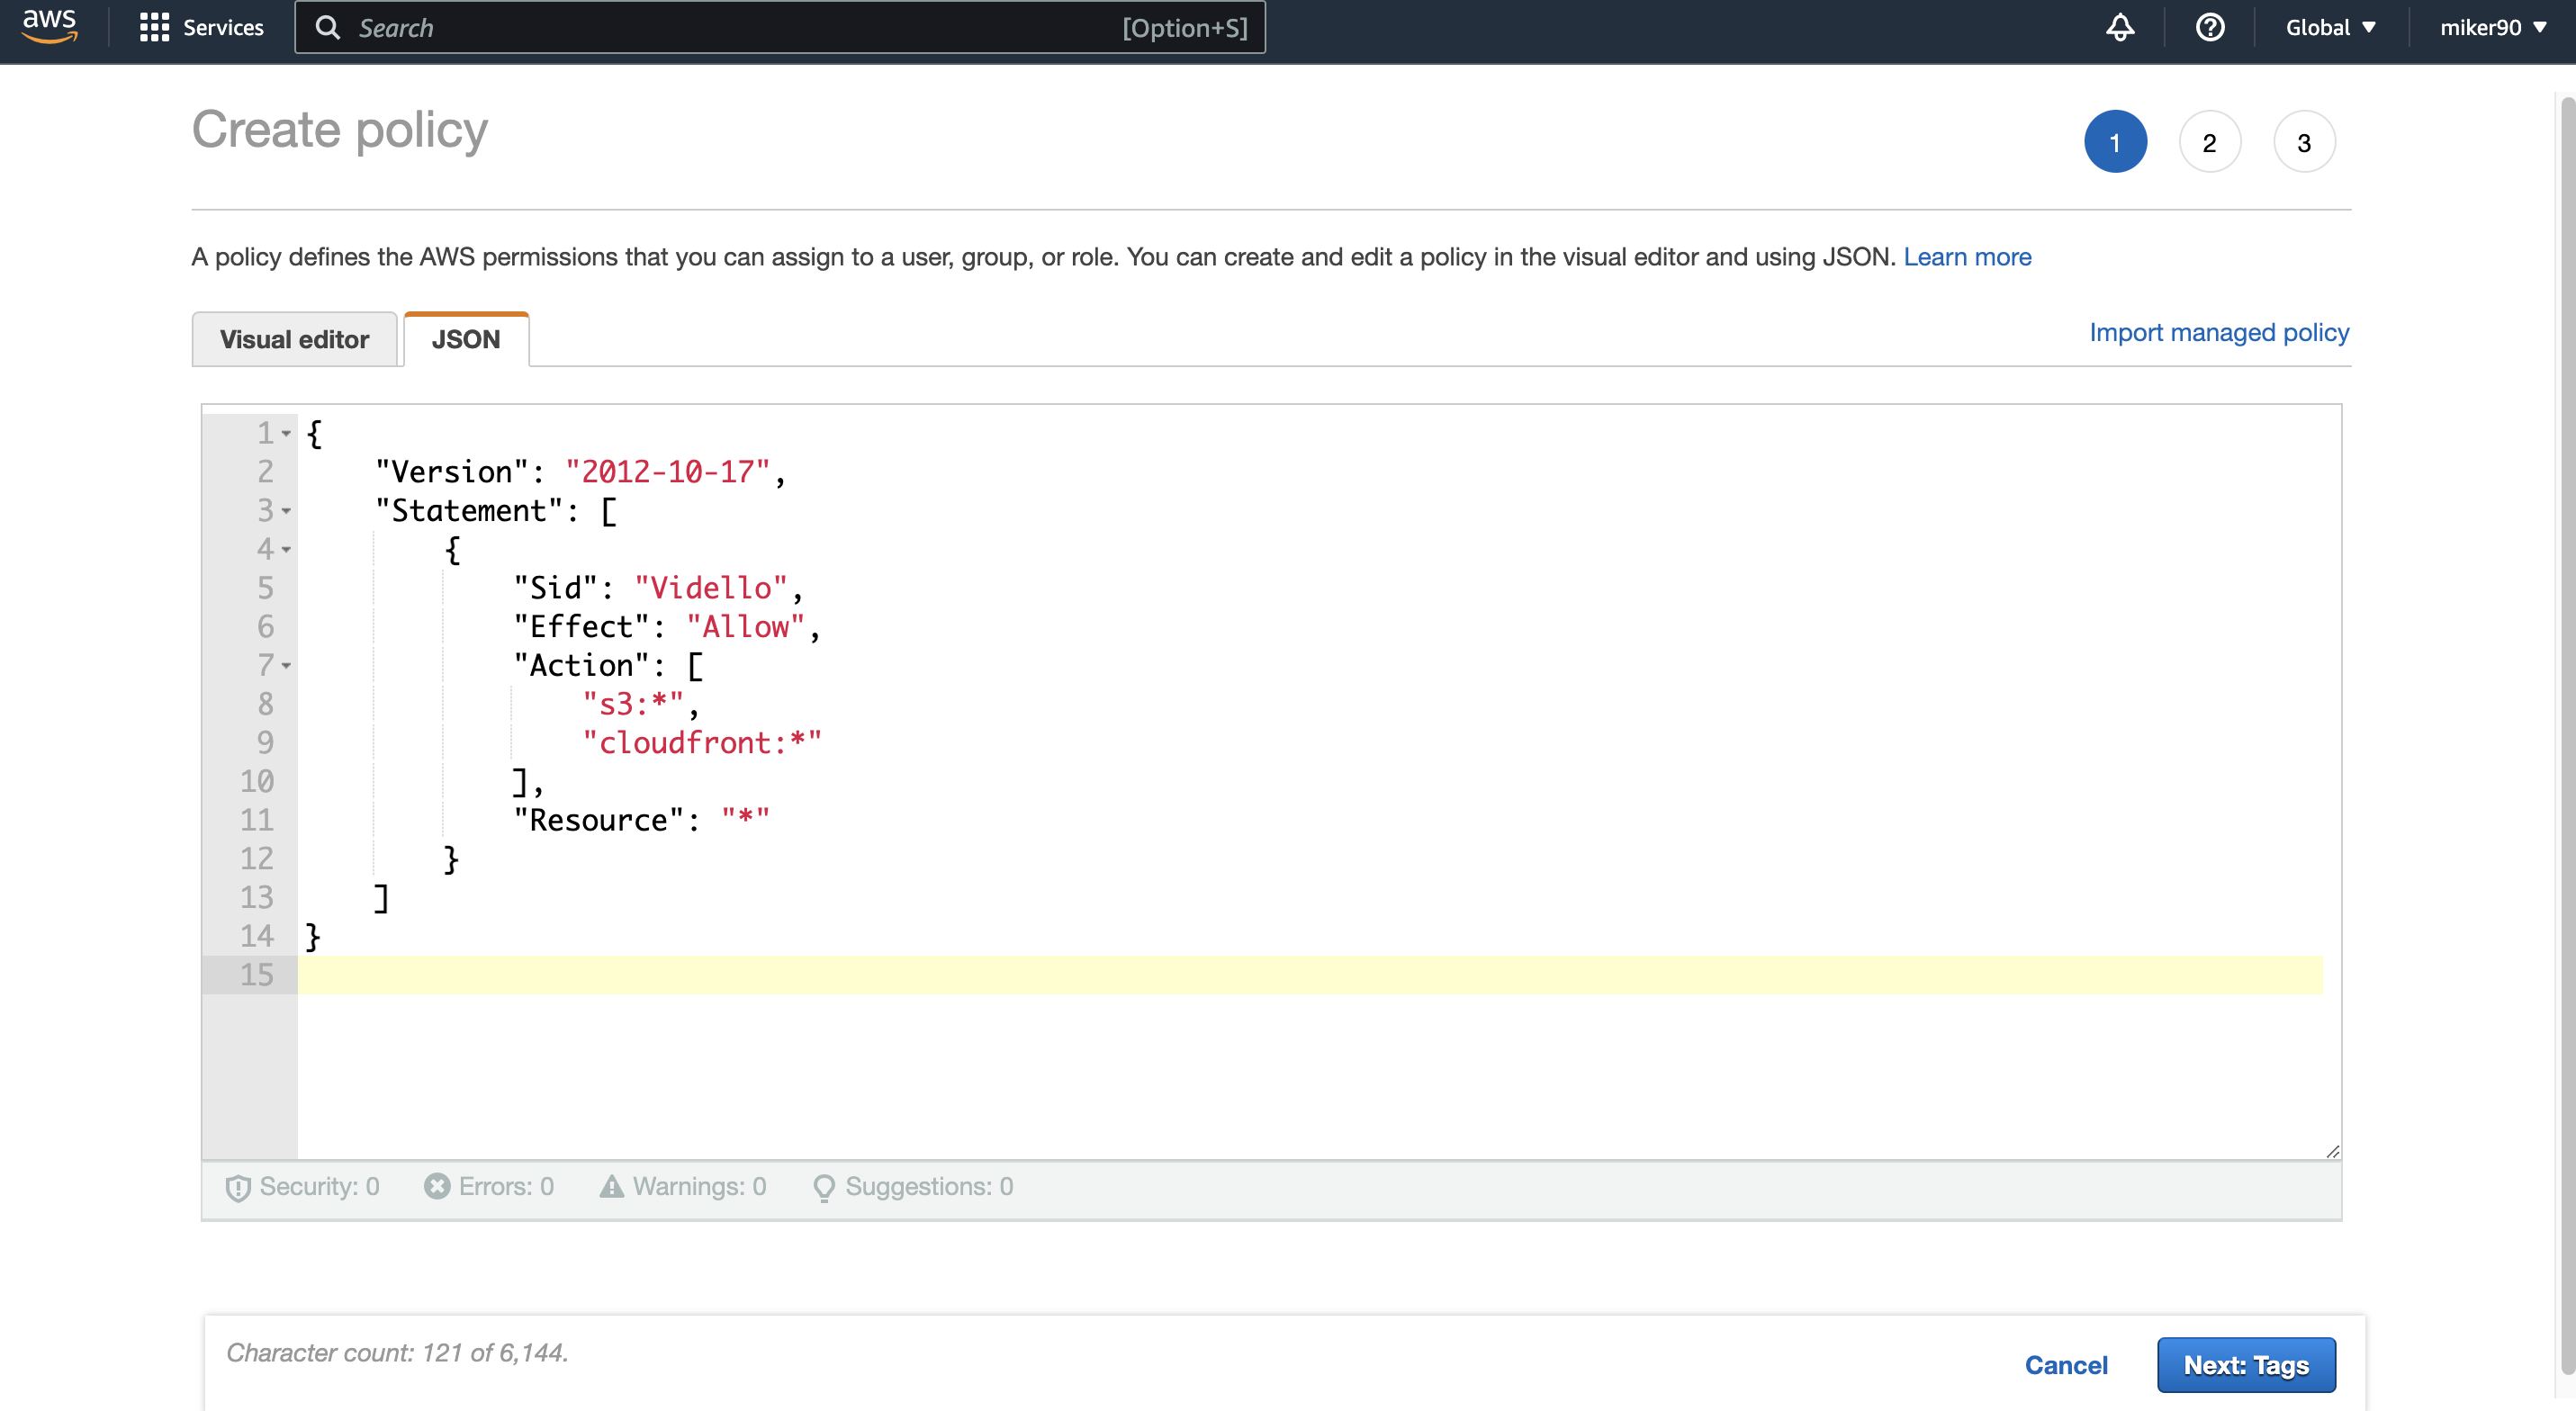
Now, you need to click on "JSON" tab. Delete whatever you can see there...
And copy and paste there a following code:
{
"Version": "2012-10-17",
"Statement": [
{
"Sid": "Vidello",
"Effect": "Allow",
"Action": [
"cloudfront:*",
"s3:*",
"ec2:DescribeRegions",
"acm:*"
],
"Resource": "*"
}
]
}
Then, click on the blue button in the bottom right corner, "Next: Tags"
In the next screen, click on "Next Review"
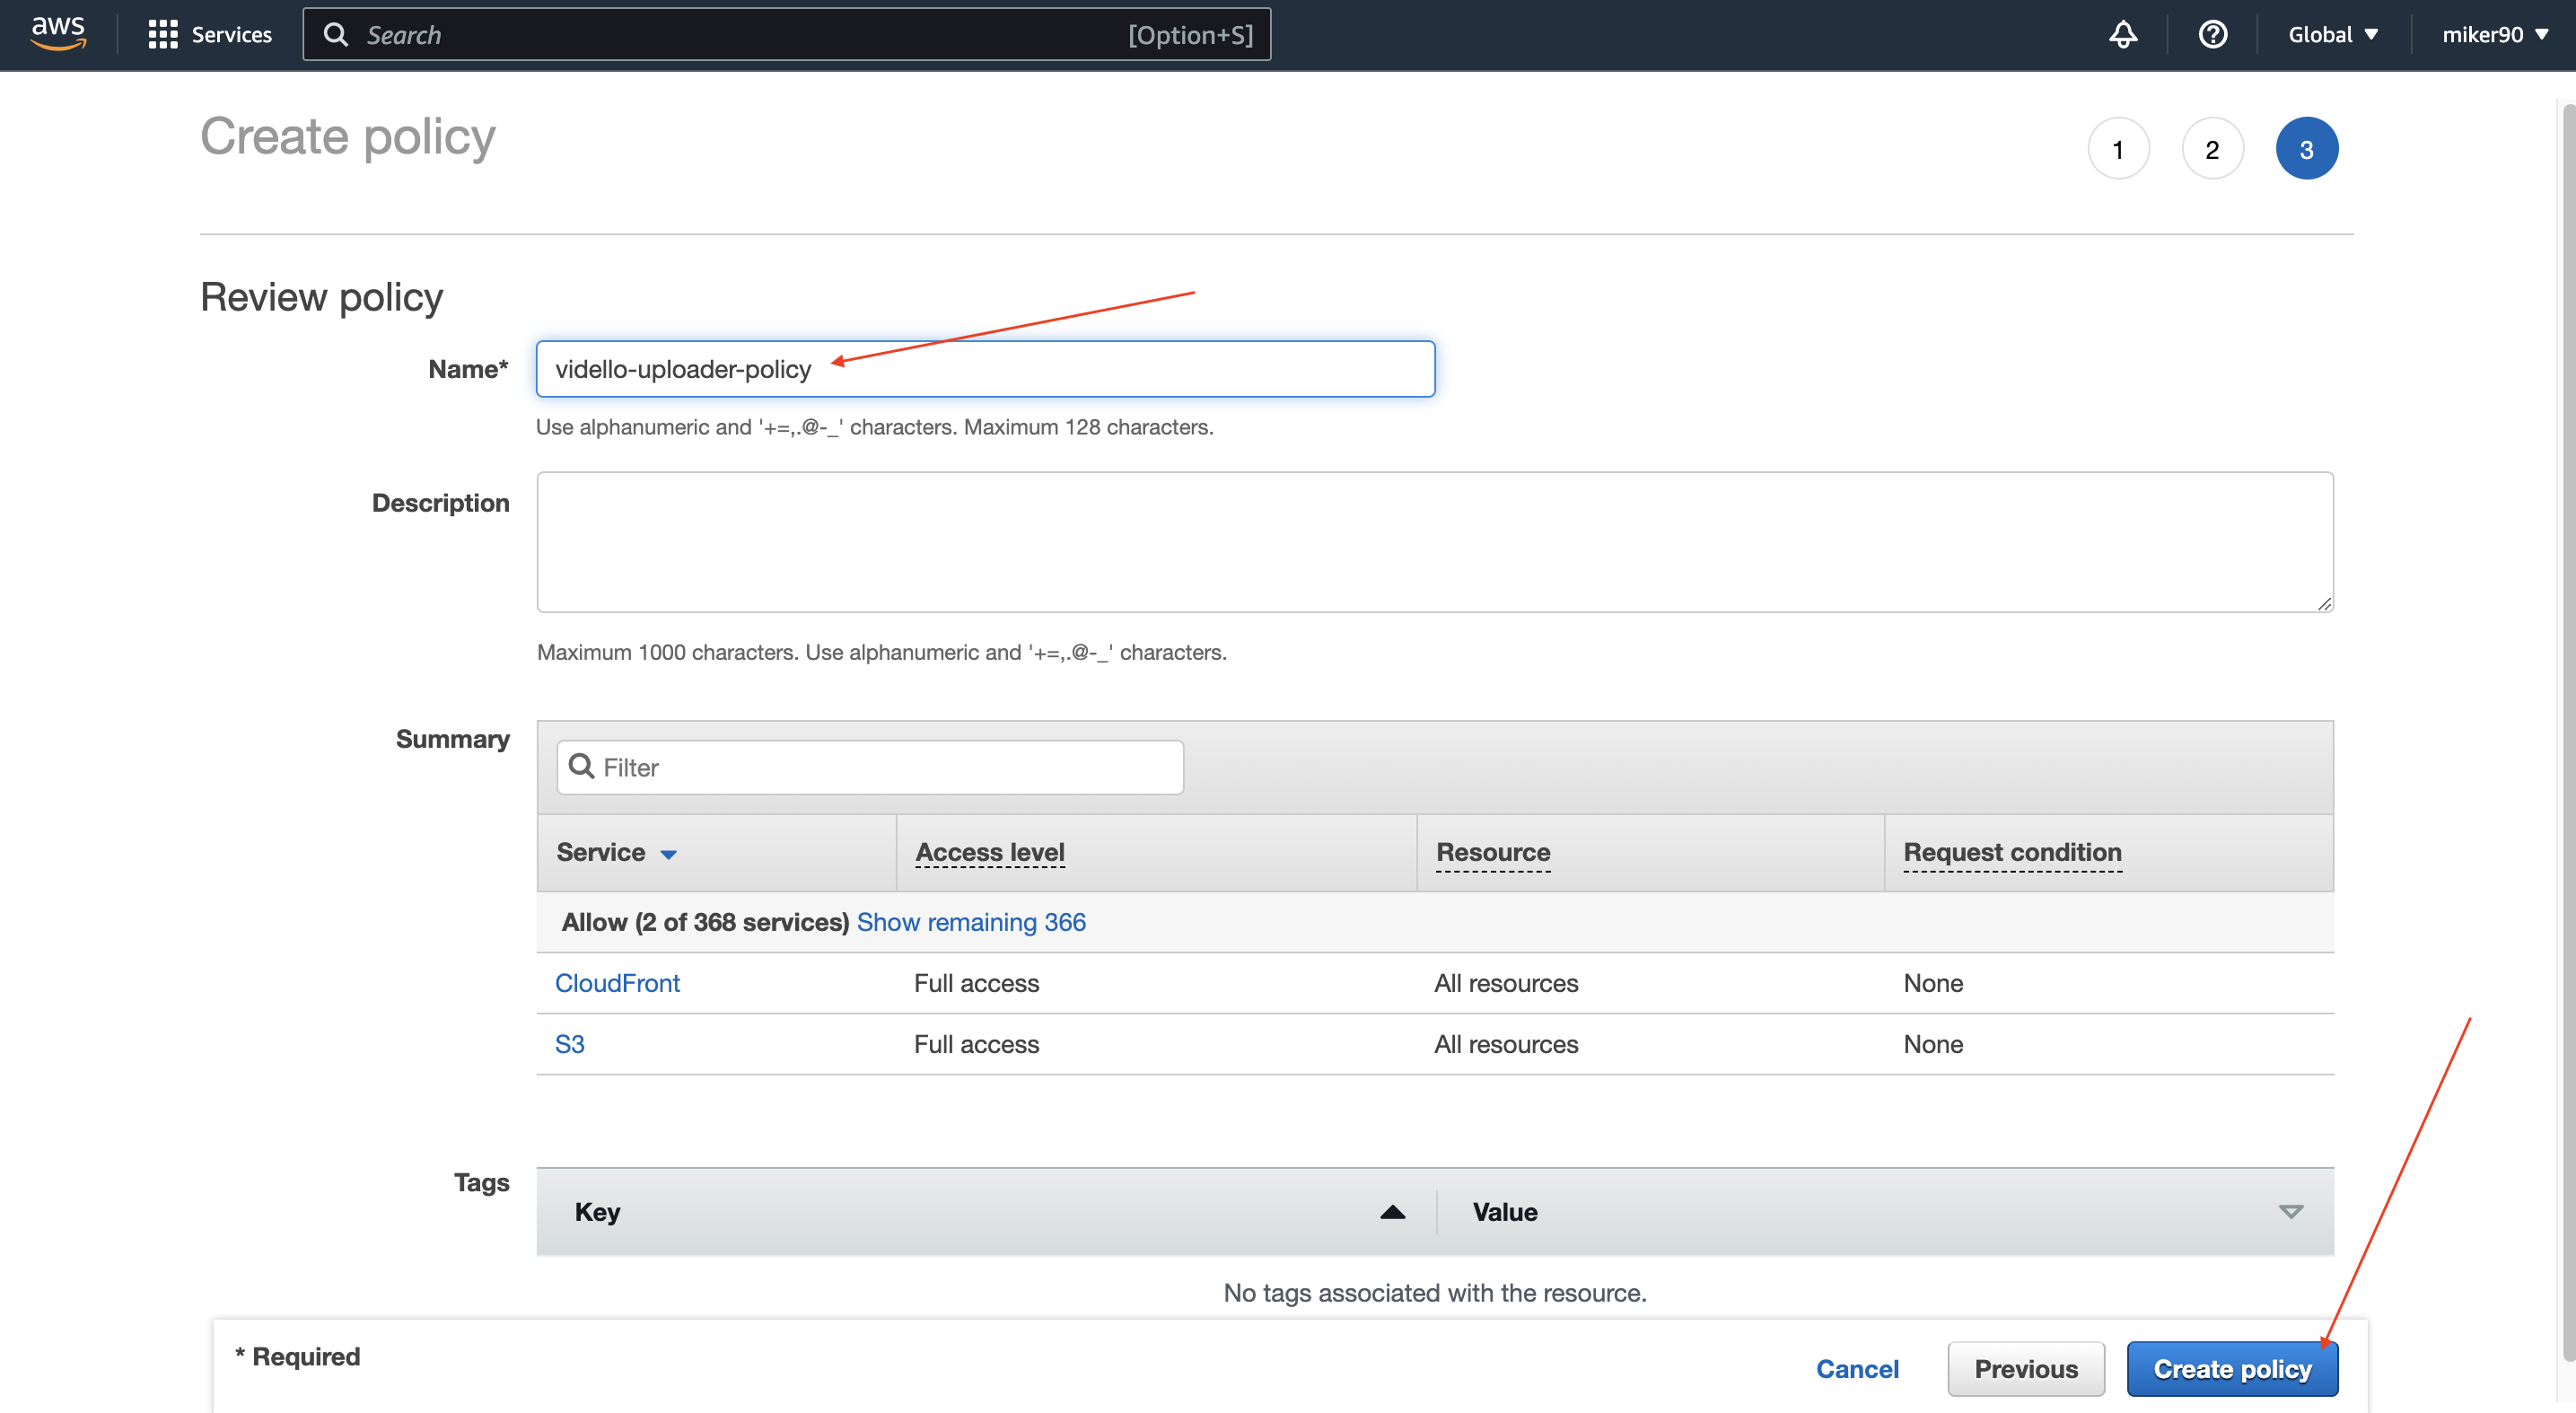
8)
Give this policy a name, for example, vidello-policy or whatever you prefer and click on "Create policy"
9)
Great!
Now, we need to create a user. Simply click on "Users"
10)
Now, click on "Add users"
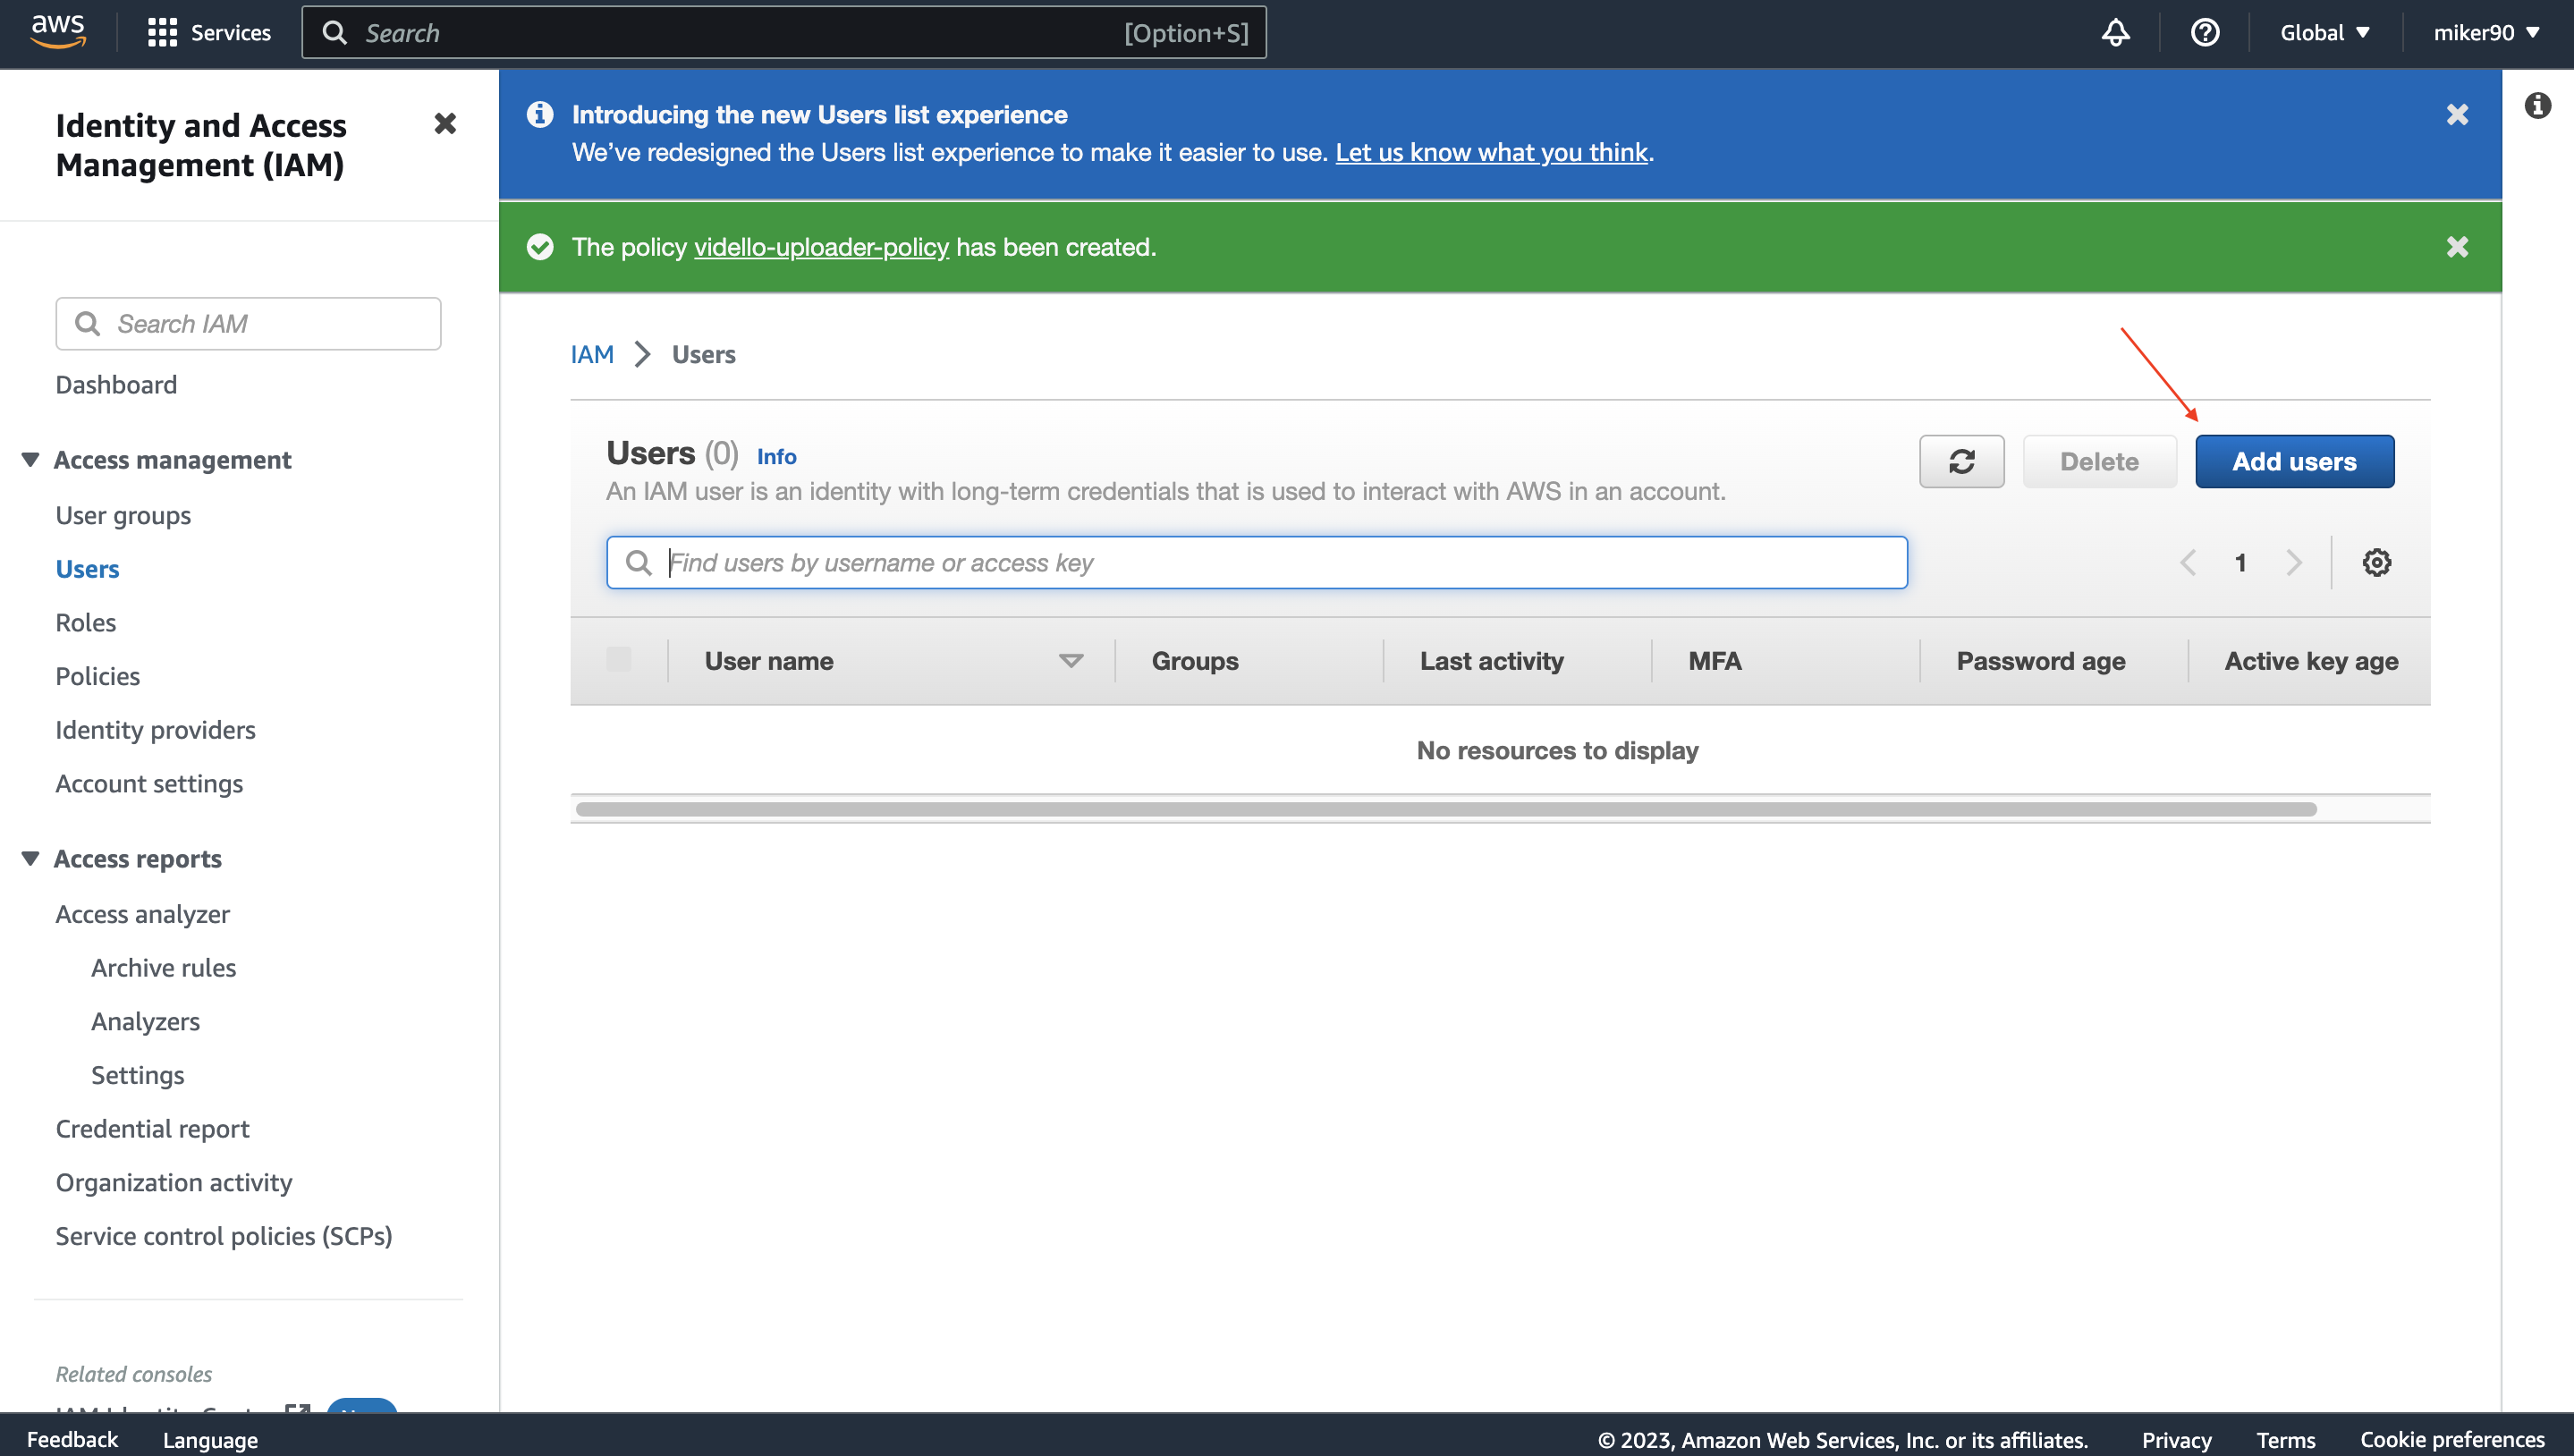
11)
Write there any user name you like, for example "vidello" or "jack vidello" and click on "Next"
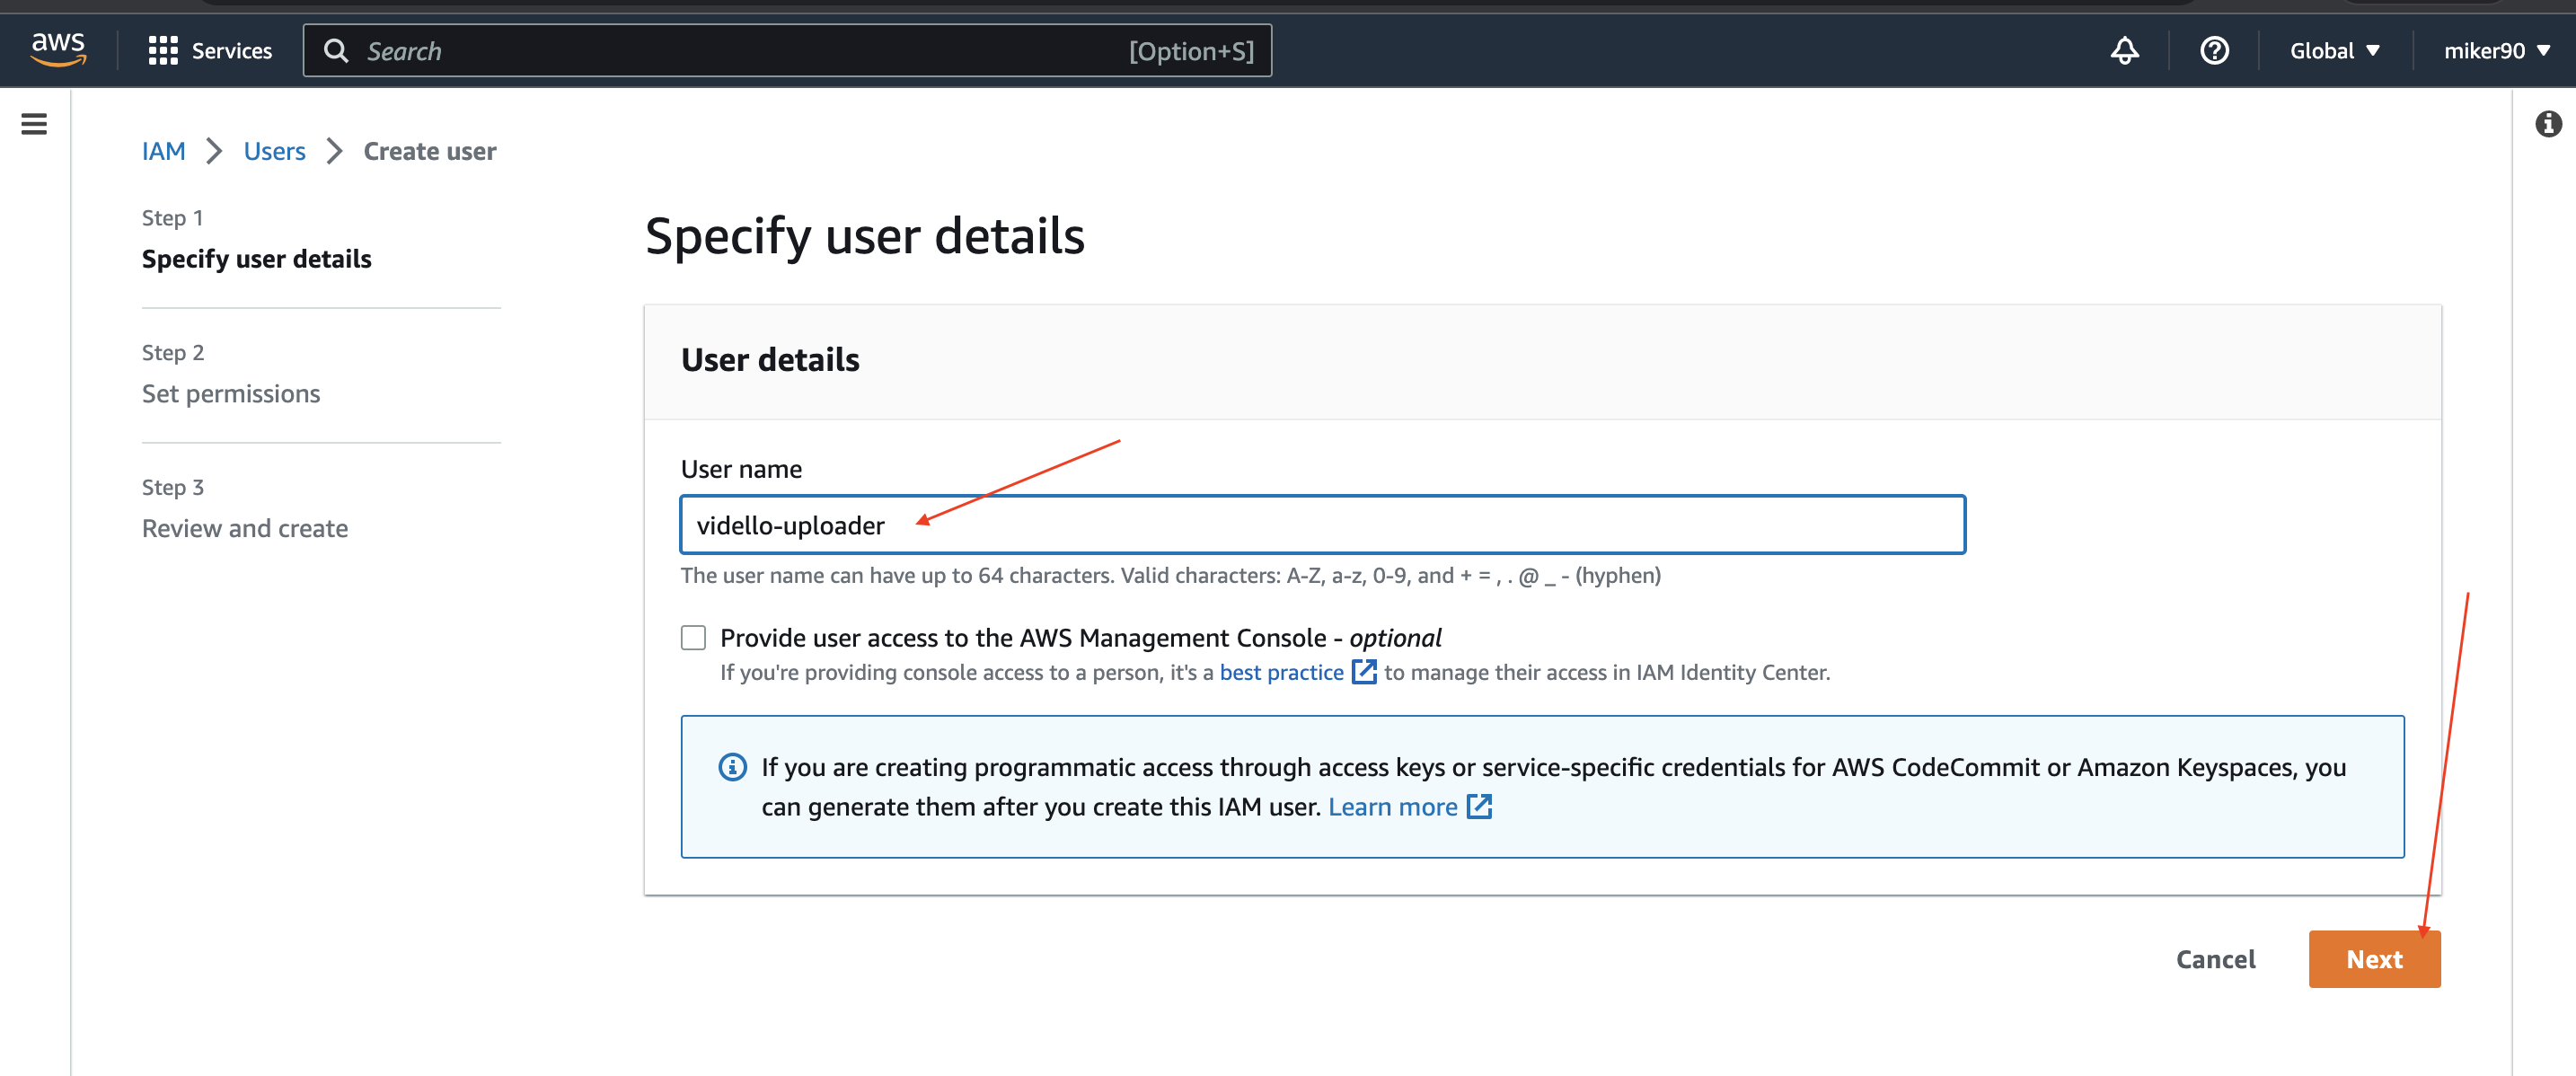
12)
We need to attach the policy to the user we created.
Click on "Attach policies directly" > in the search box, type in the name of the user you just created "vidello" > click on "Checkbox" > click on the "Next" button
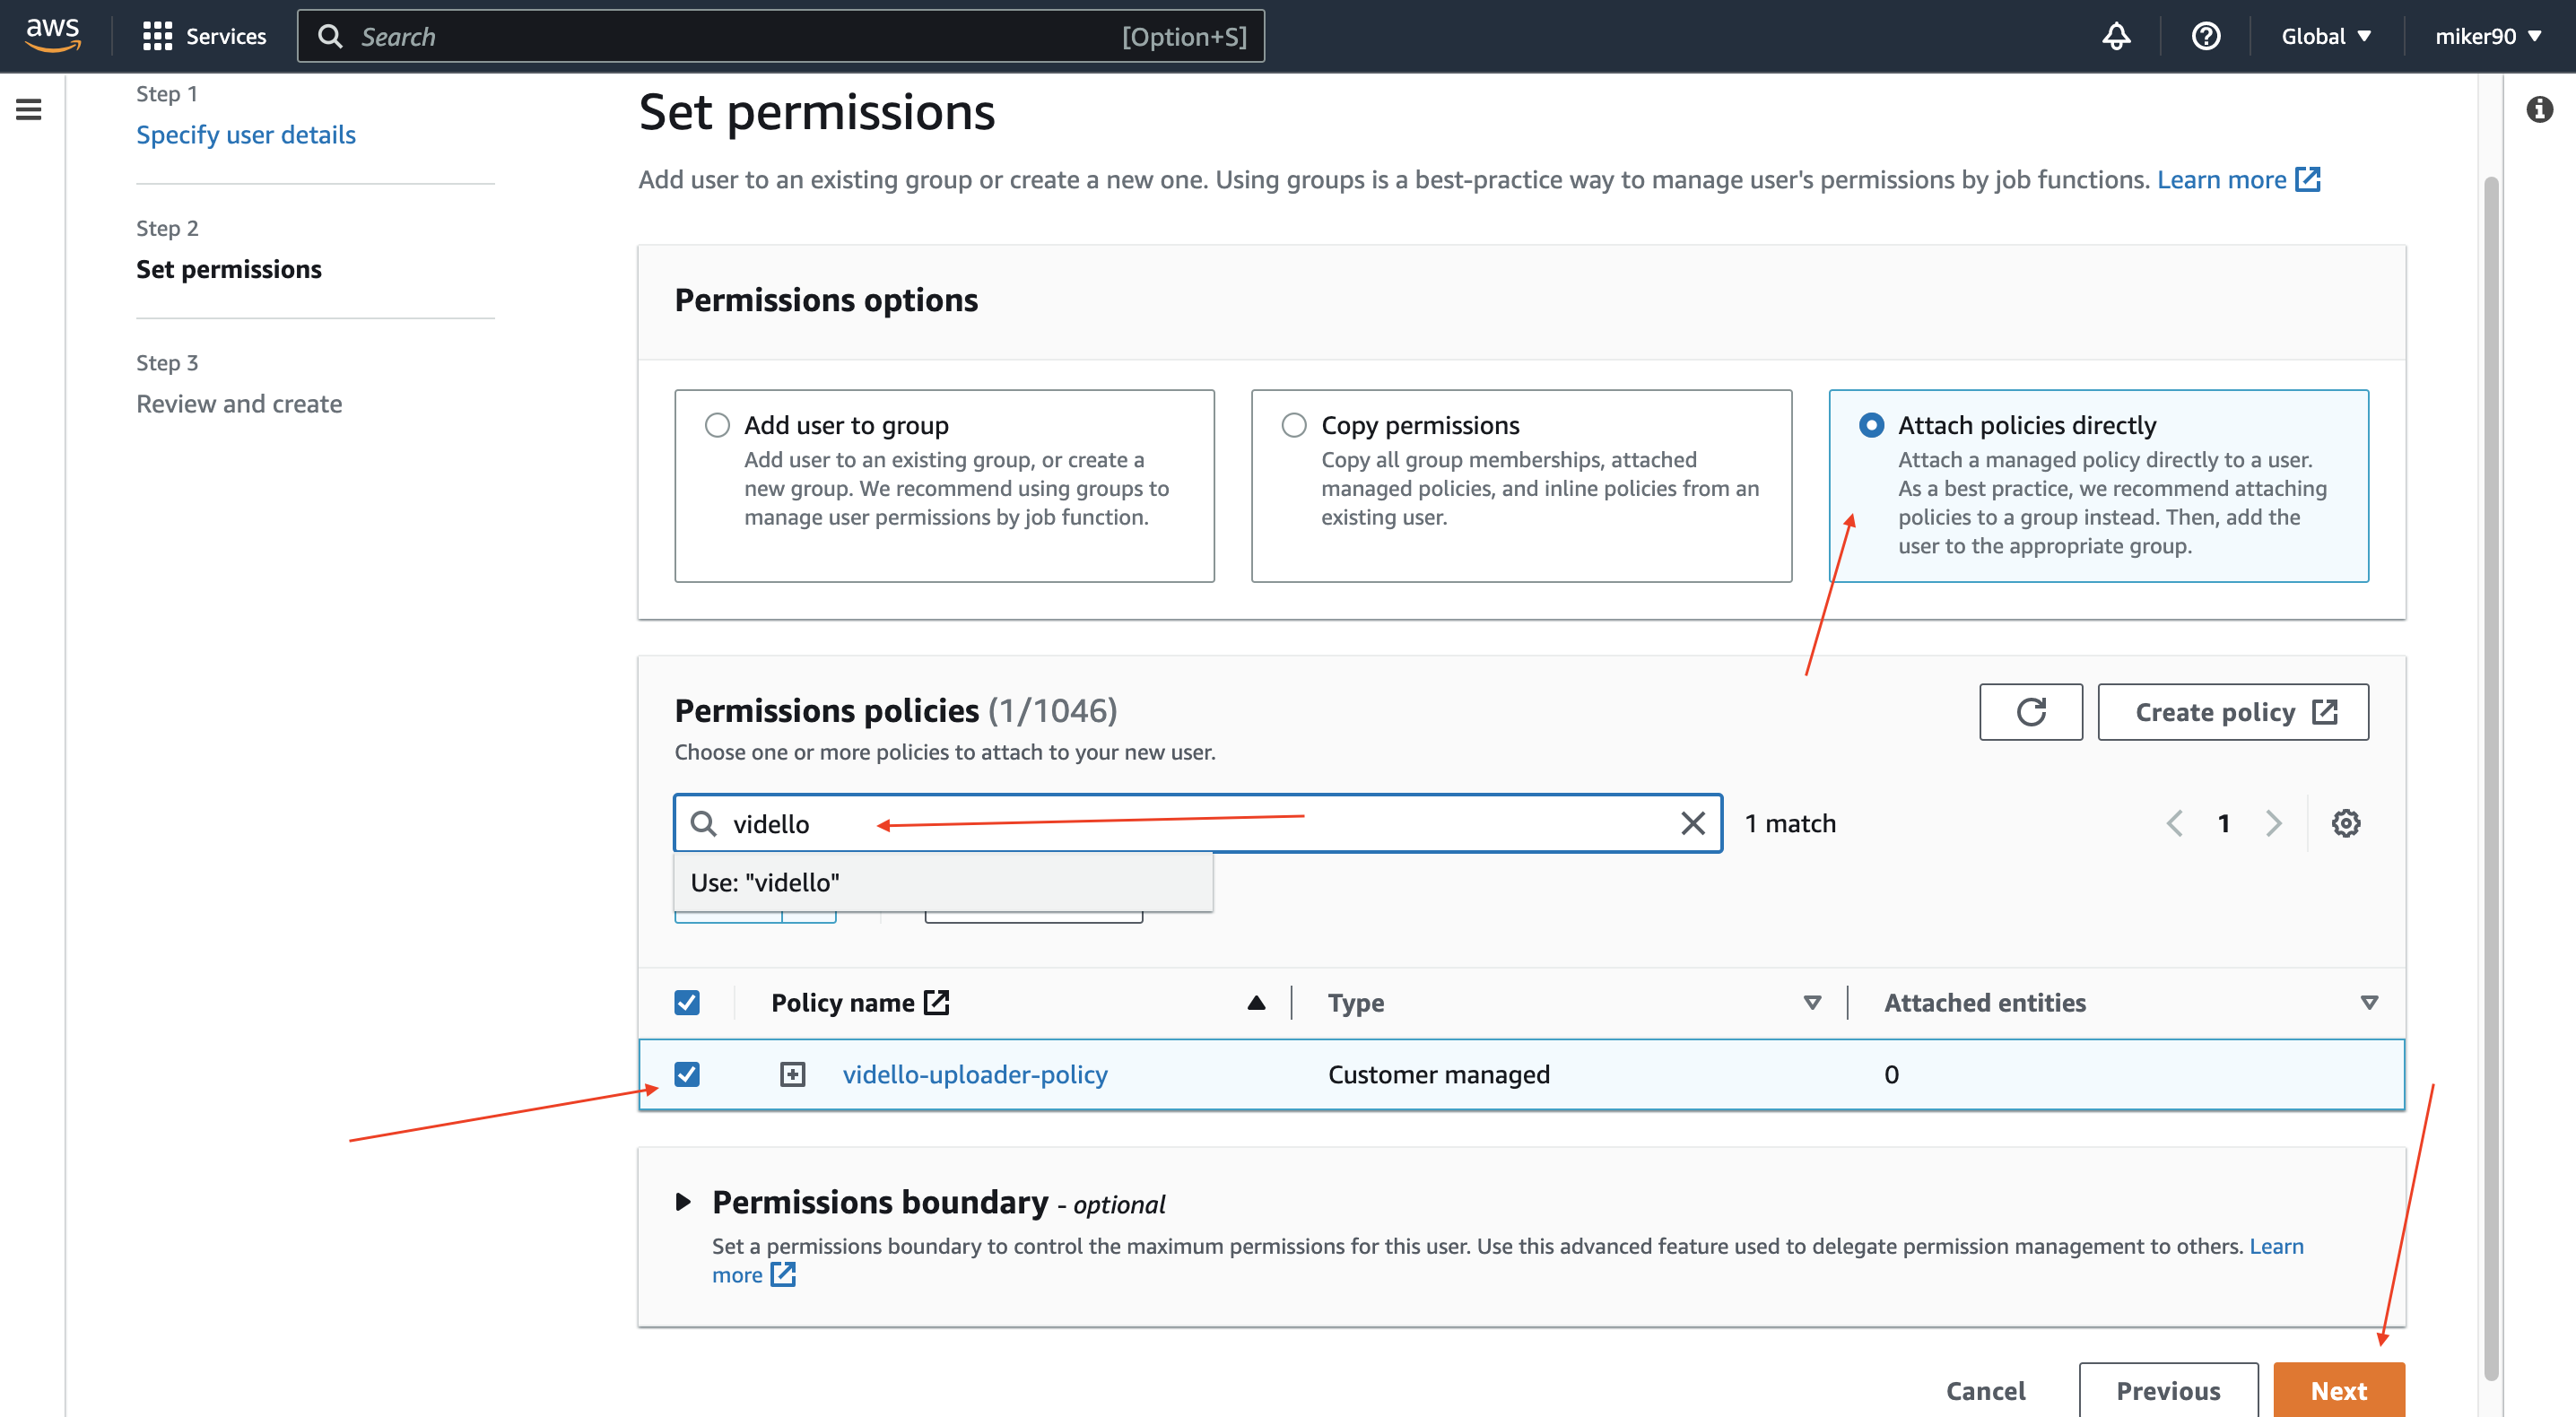
13)
Then, click on "Create user" button
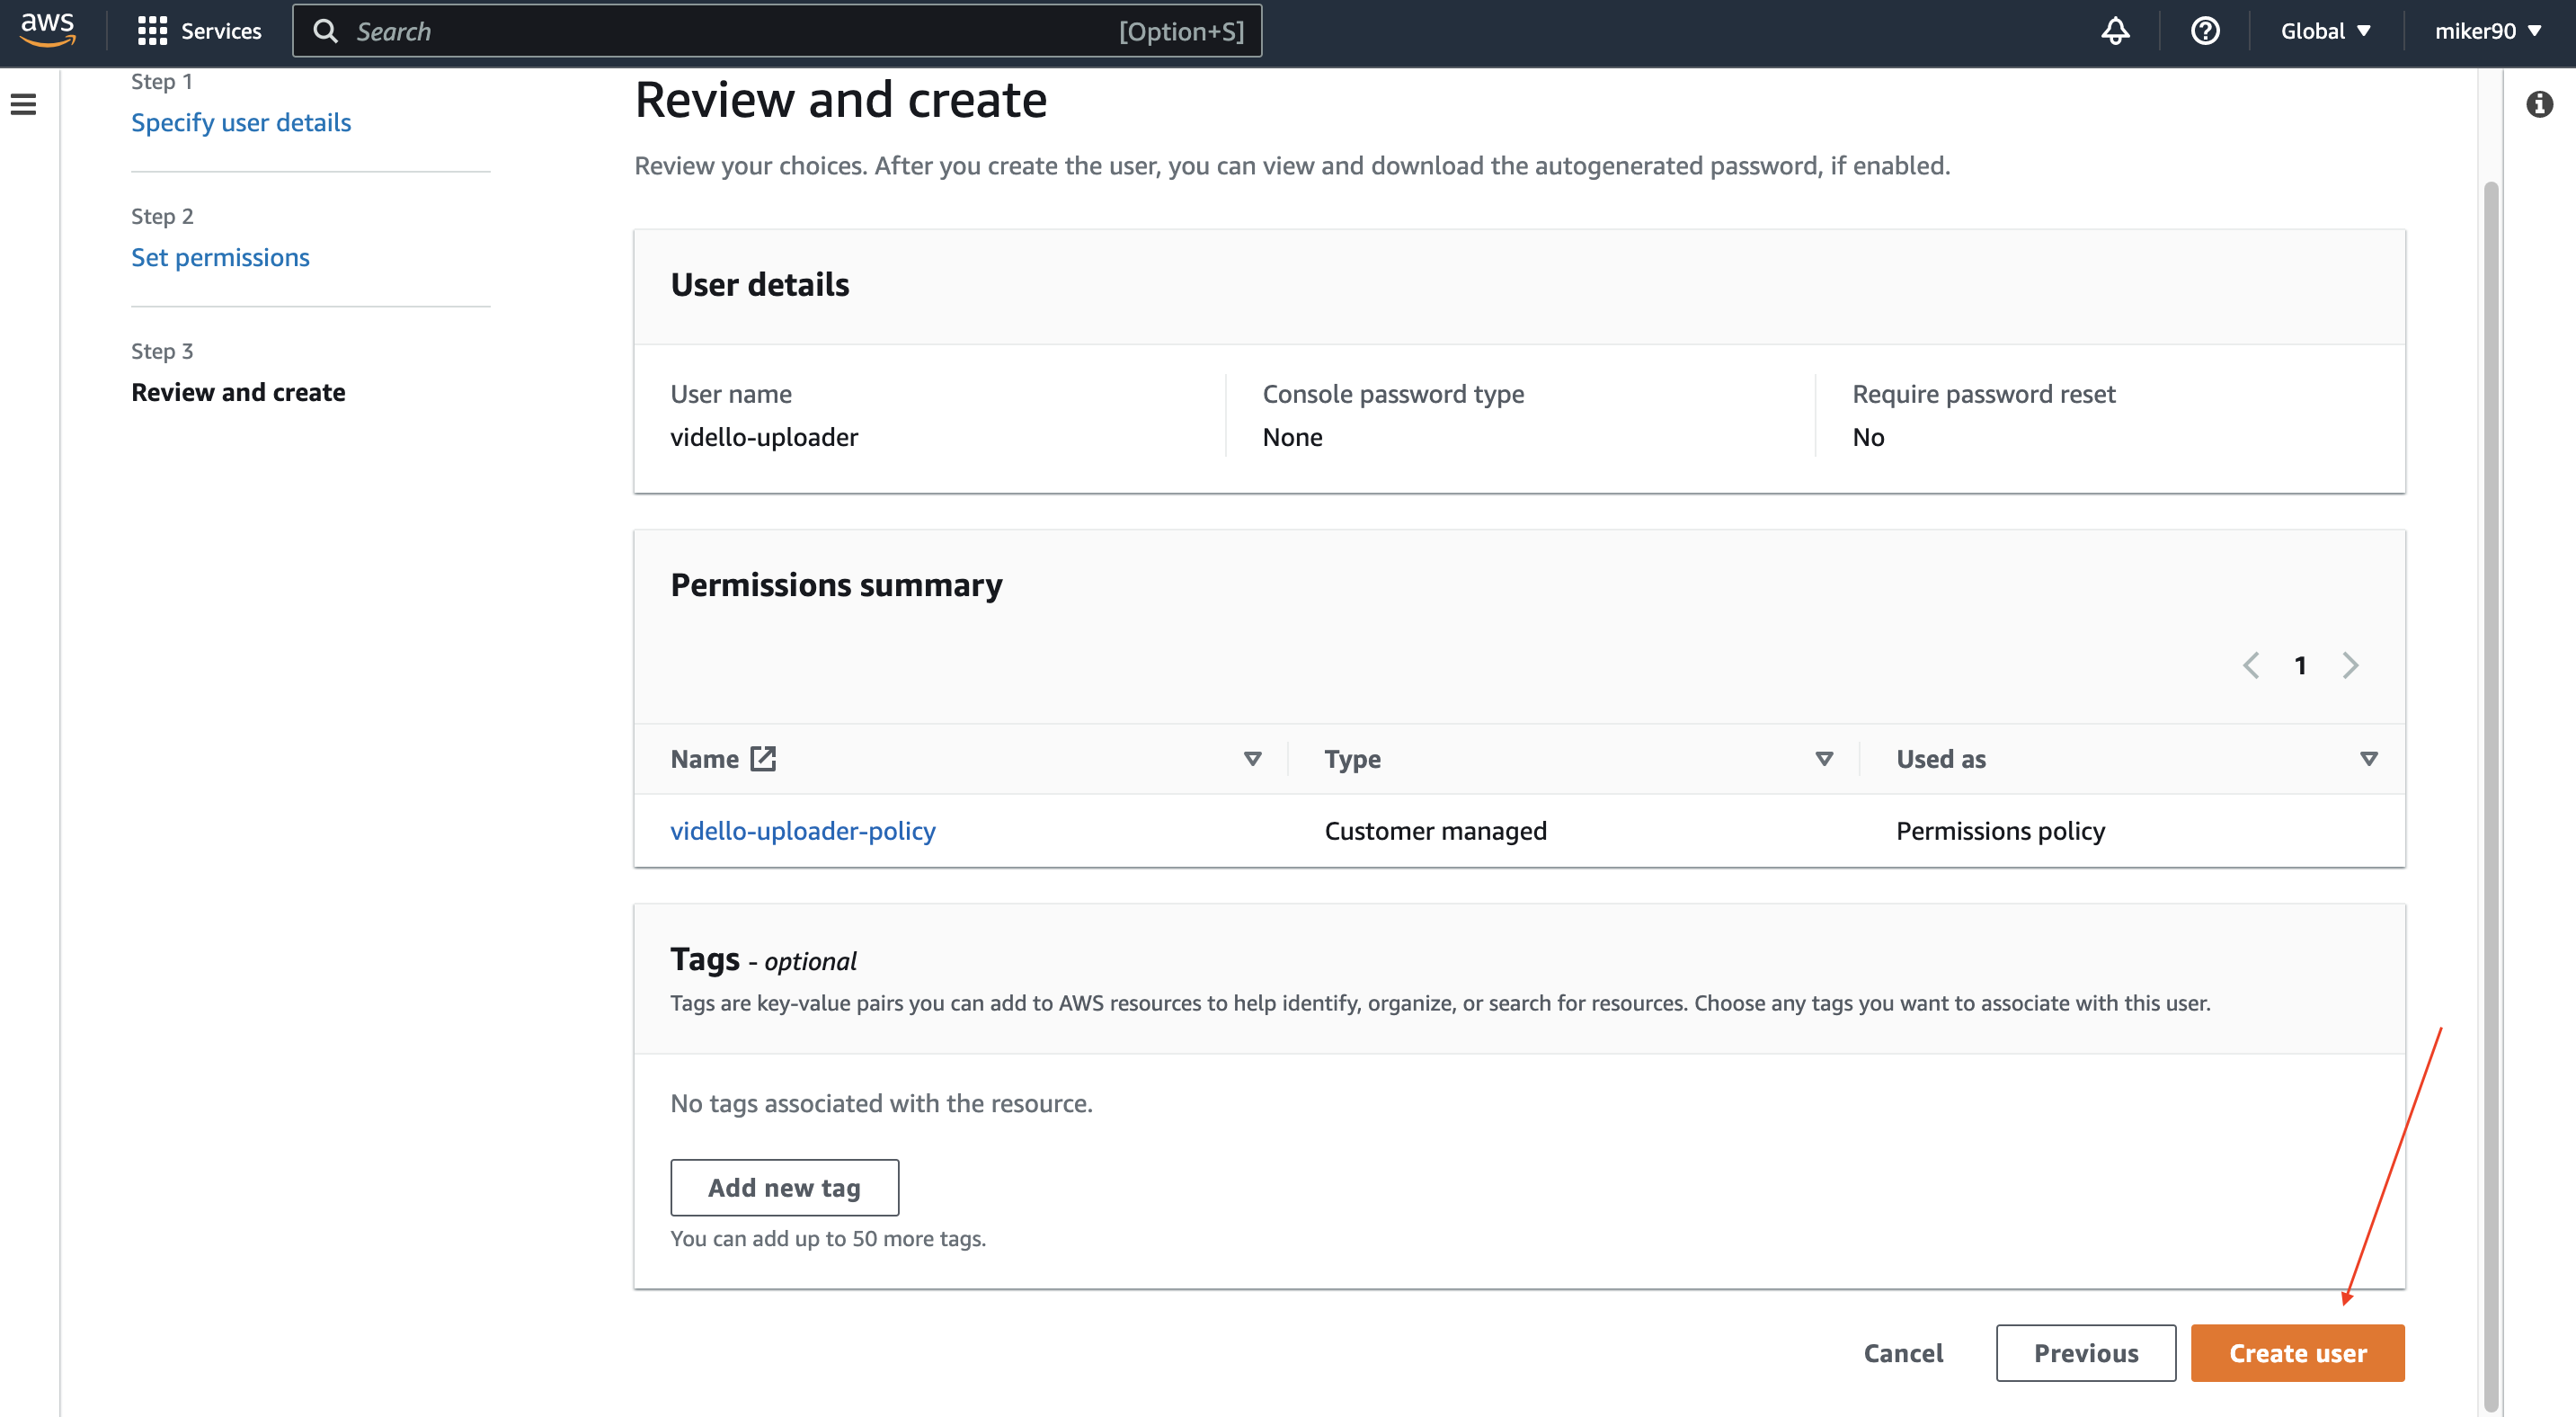
14)
We are almost there...
In the search bar, search for your user name. If you have just a single one, then click on it
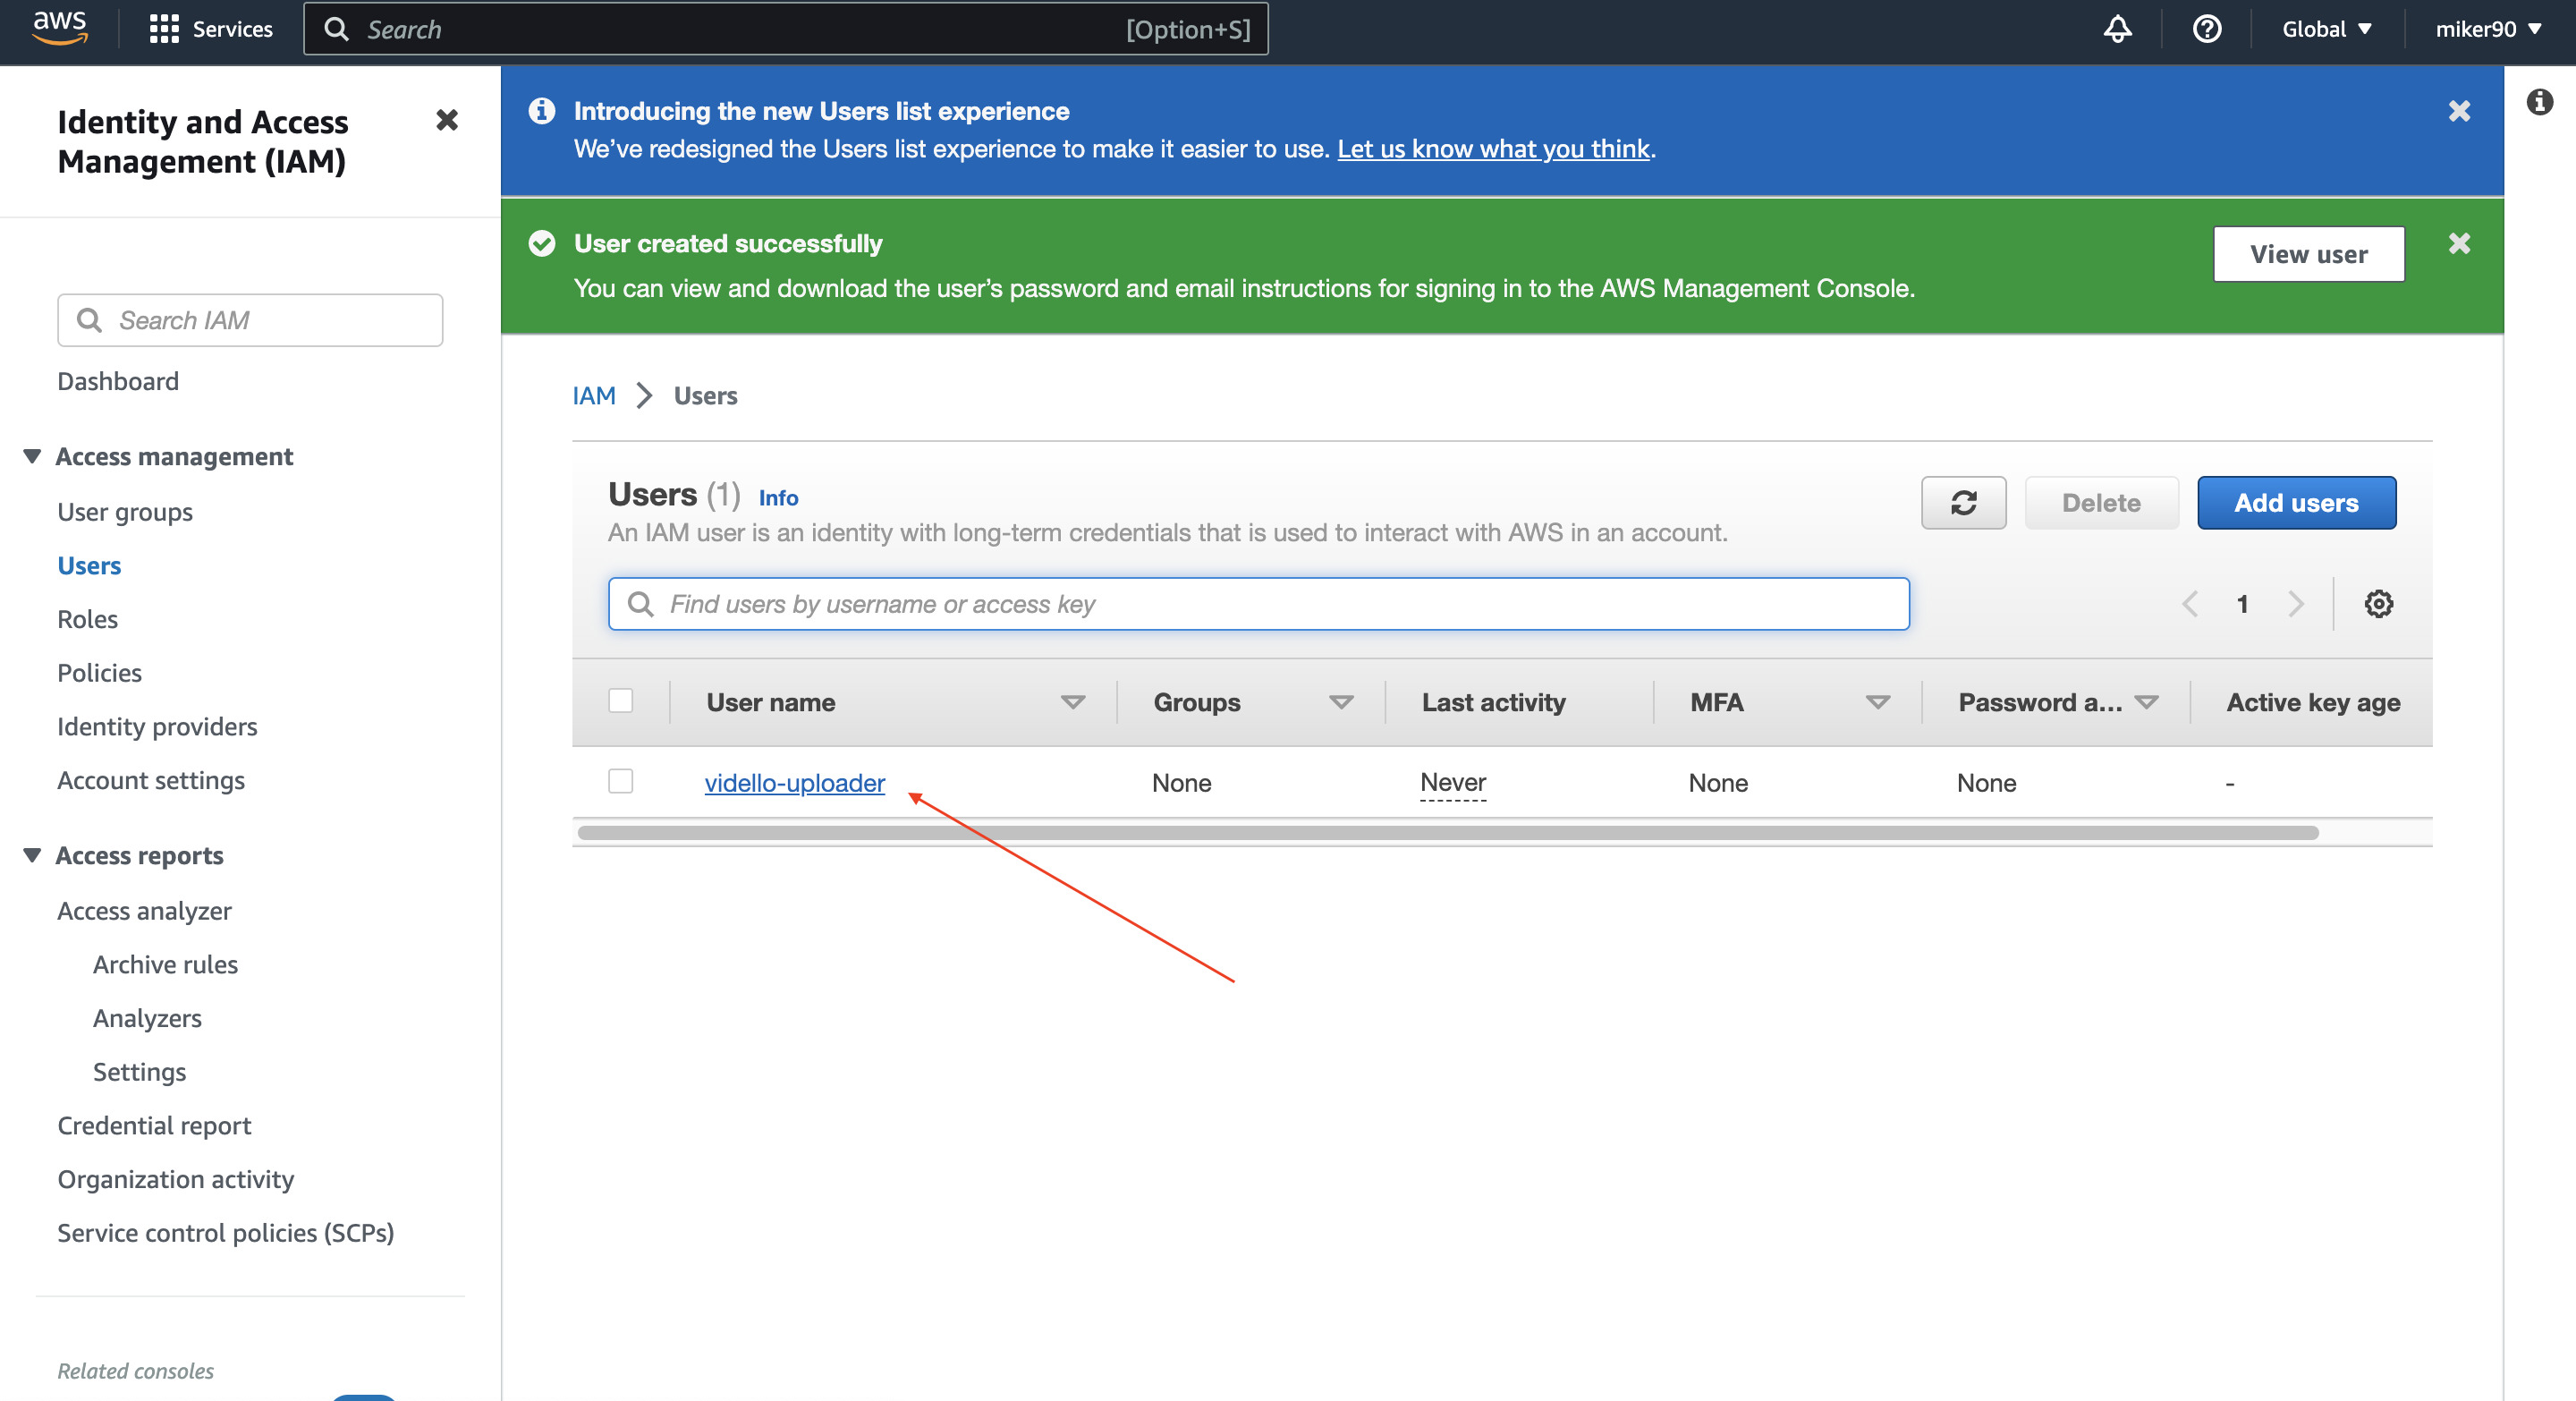
15)
Click on "Security credentials"
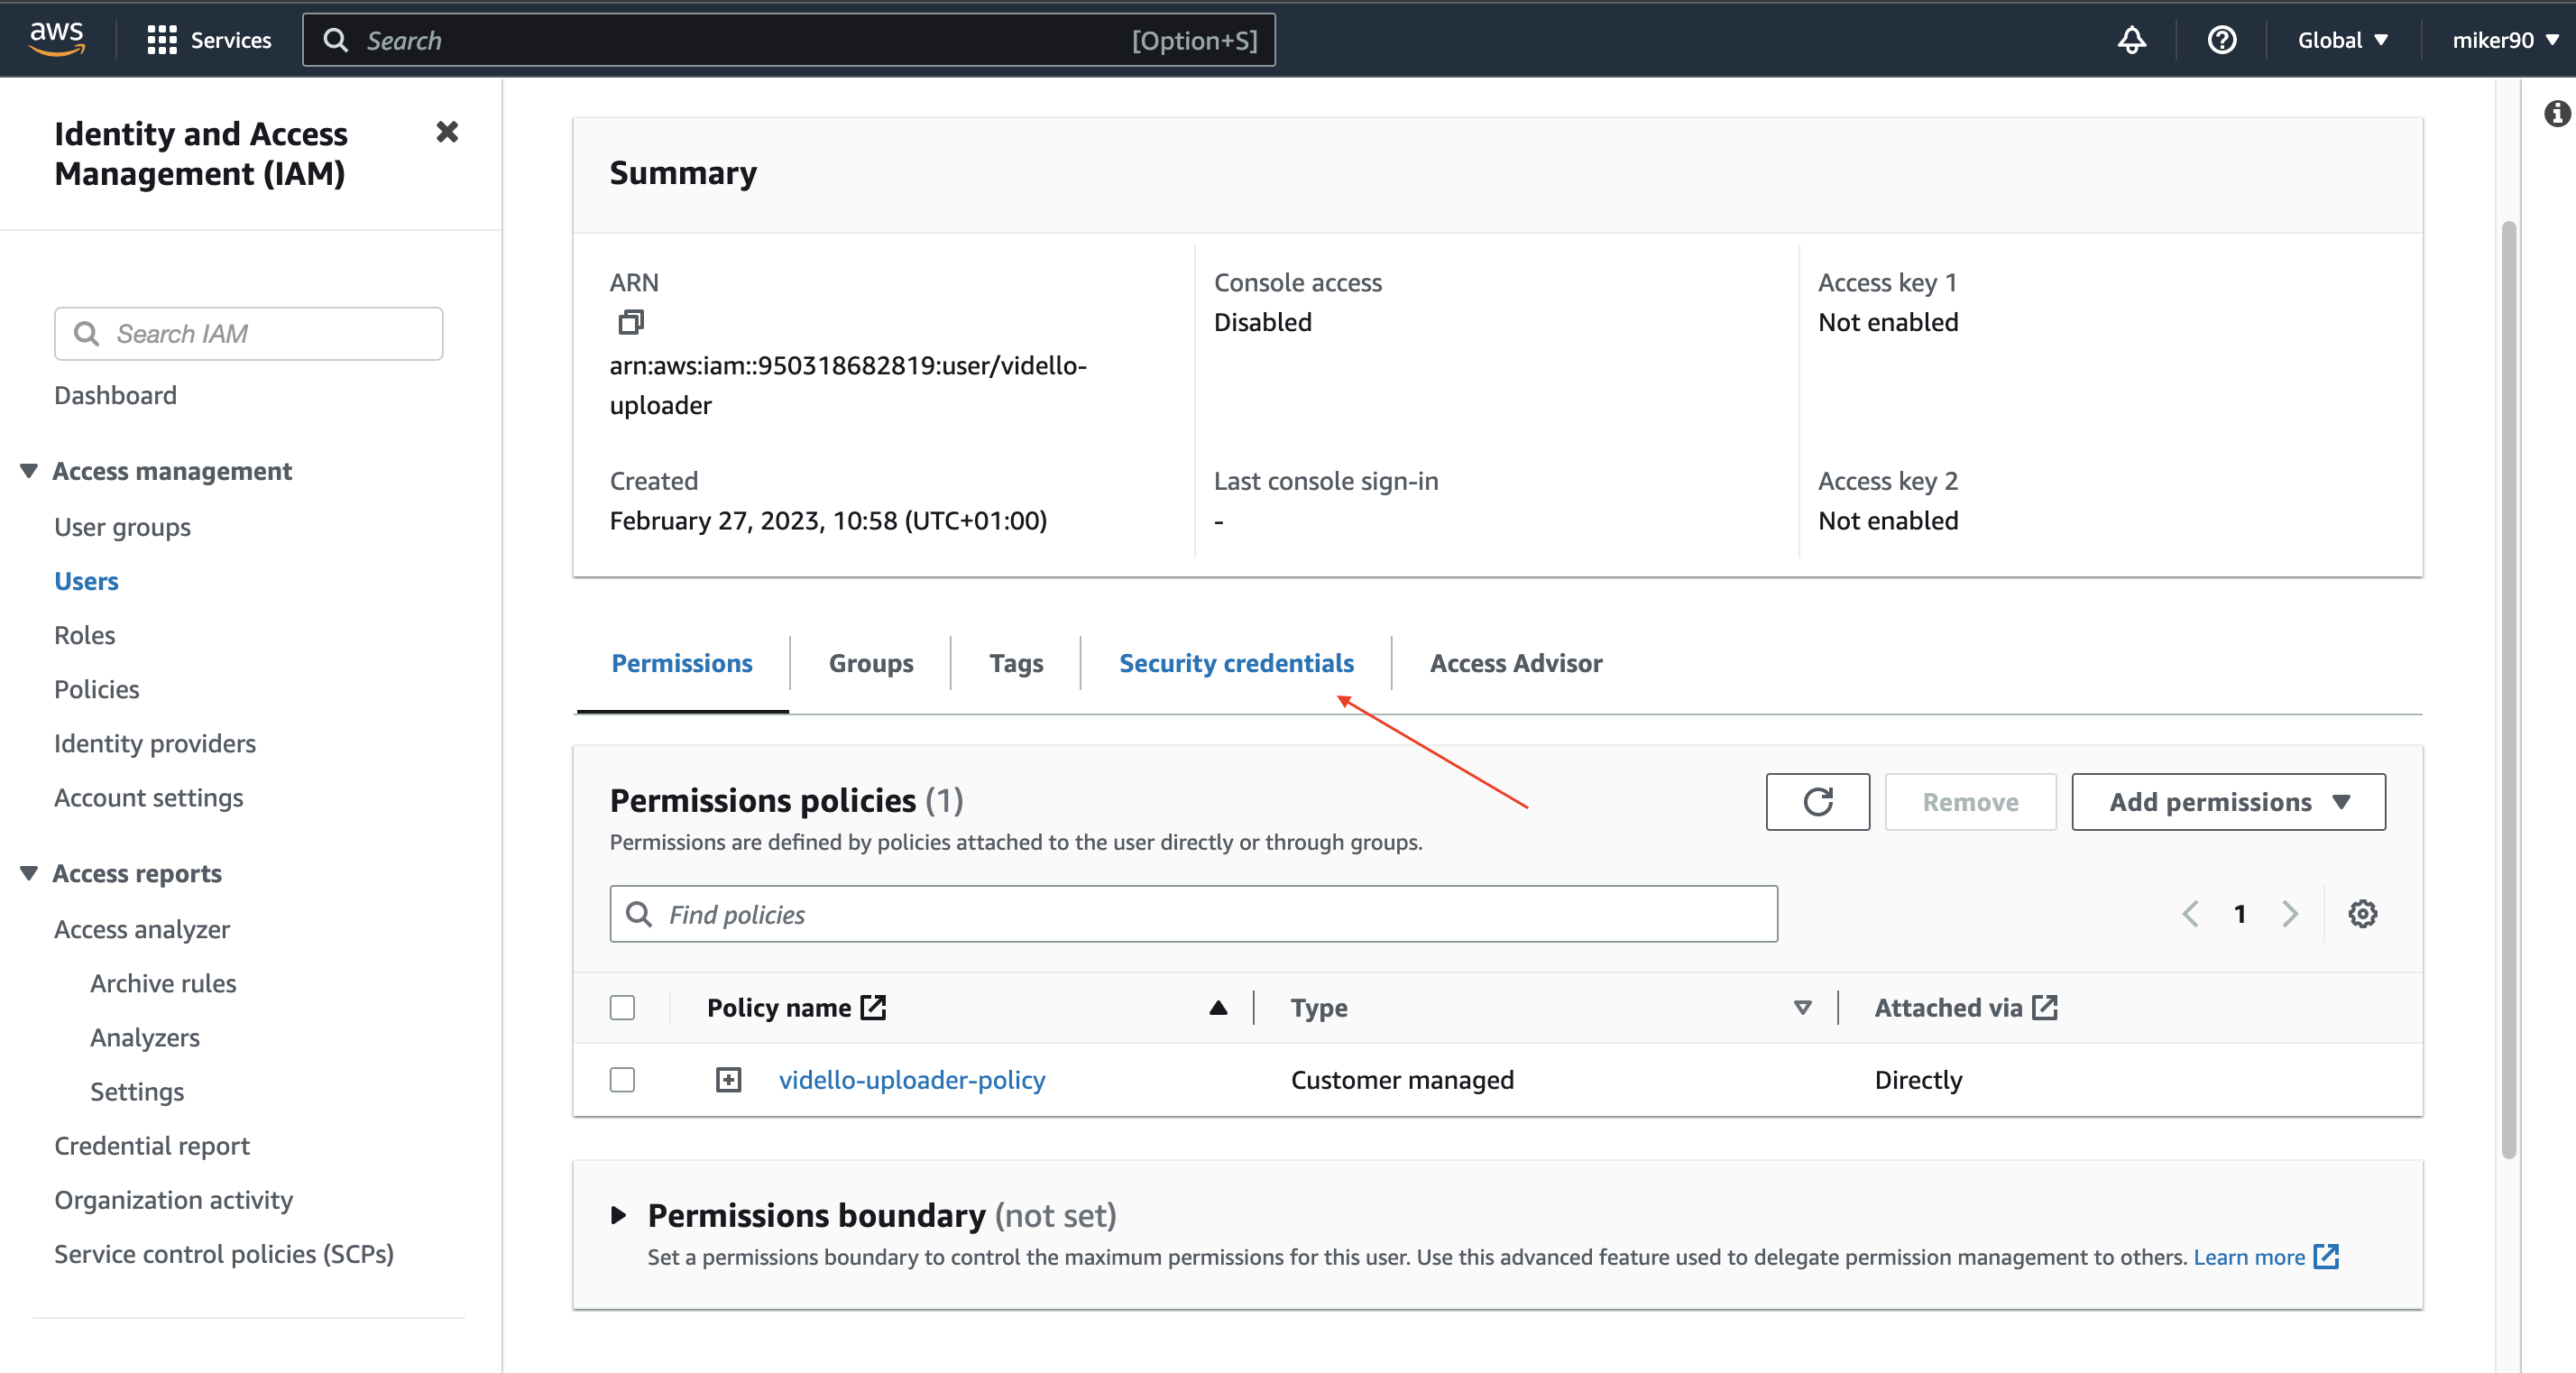
16)
Then scroll down until you find a box called "Access keys" and click on "Create access key" button
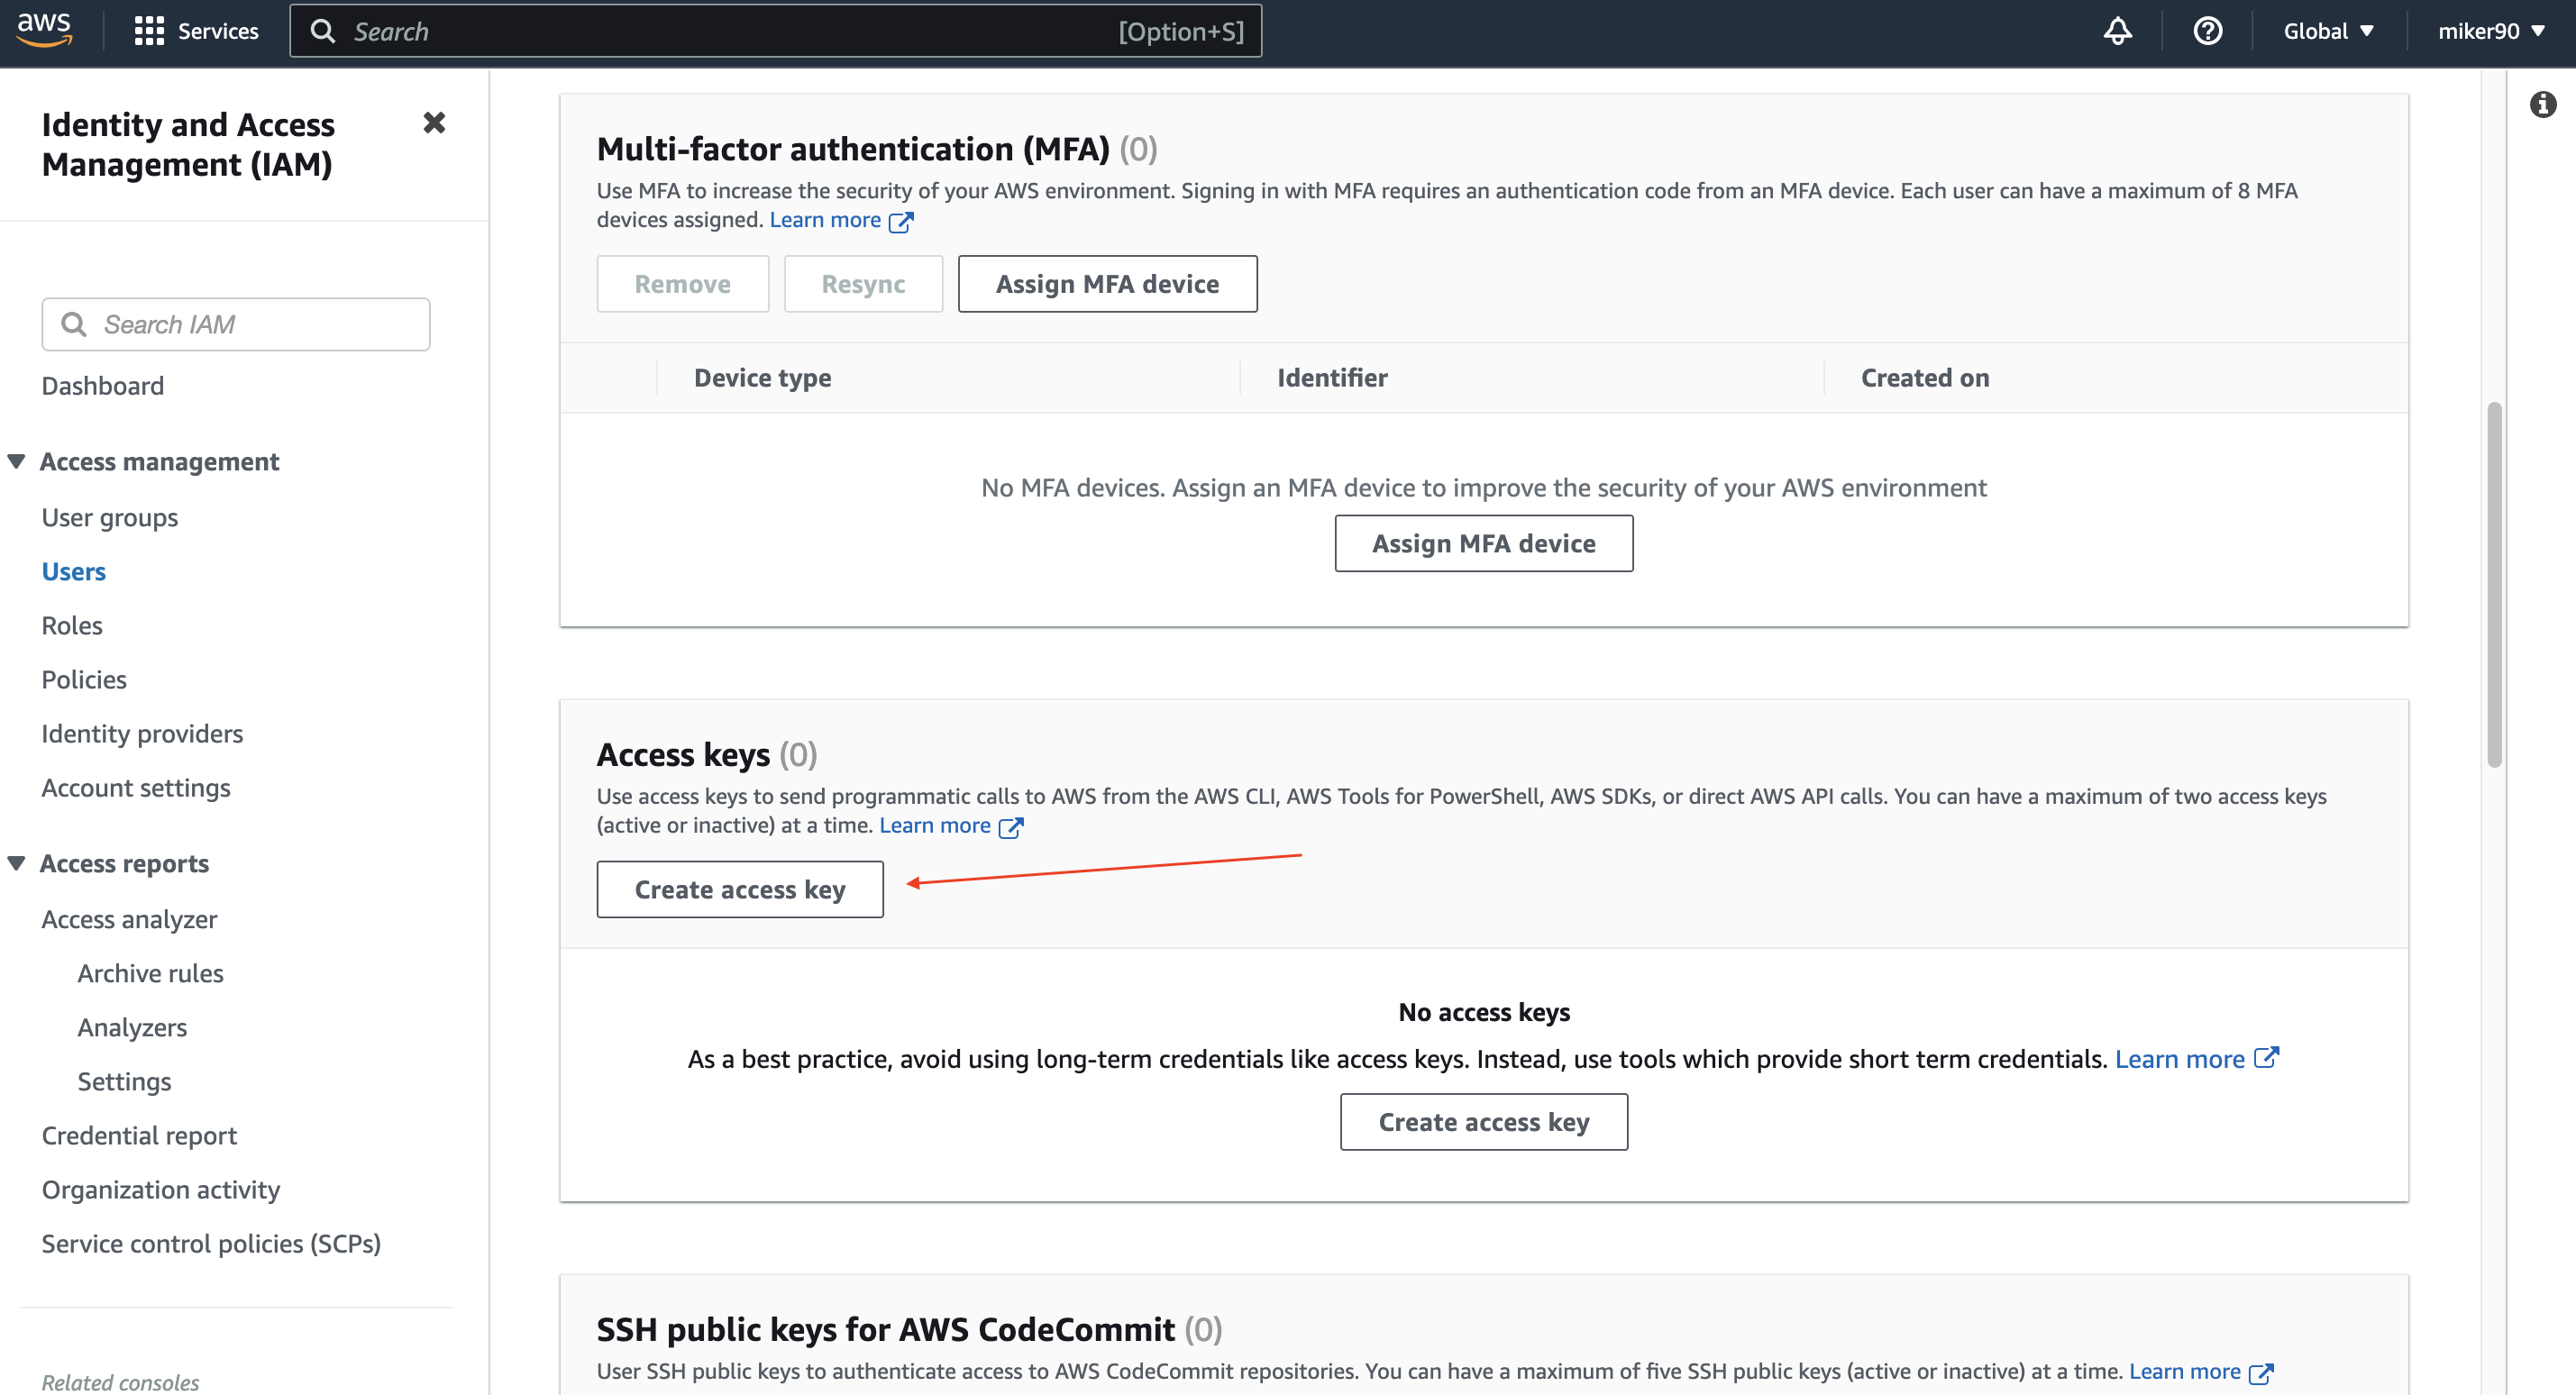
17)
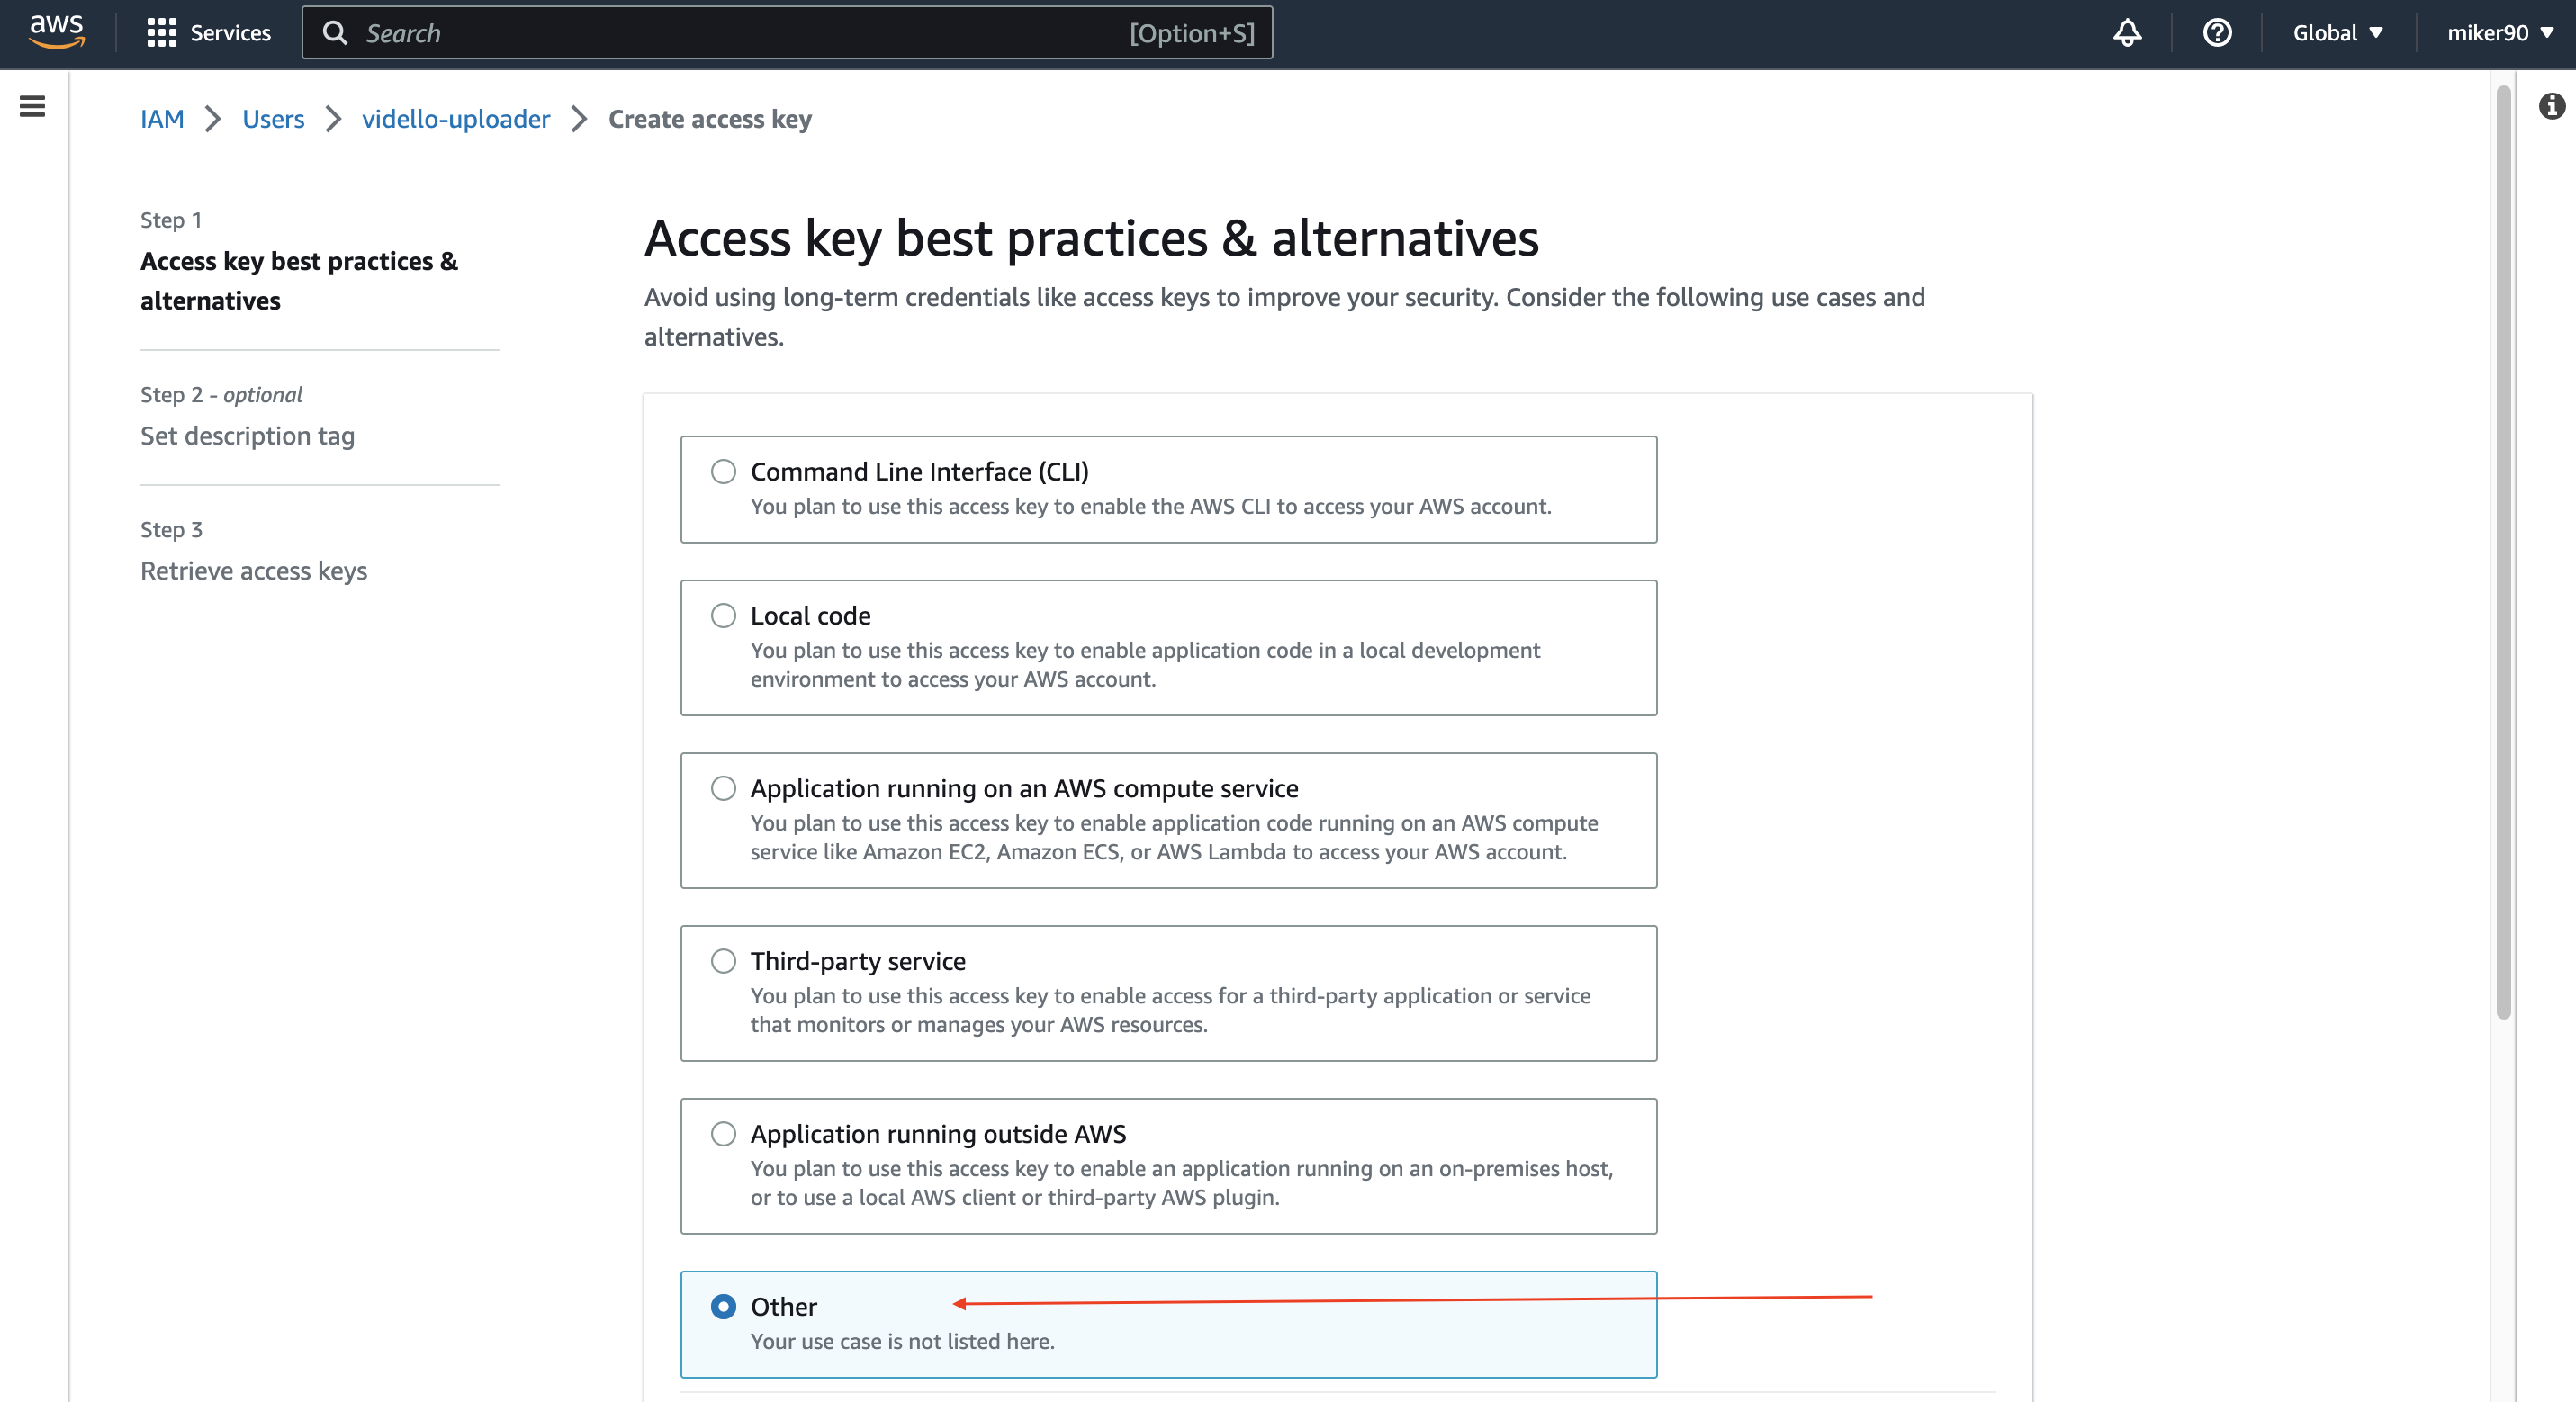
Then, select "Other" and click on the orange "Next" button
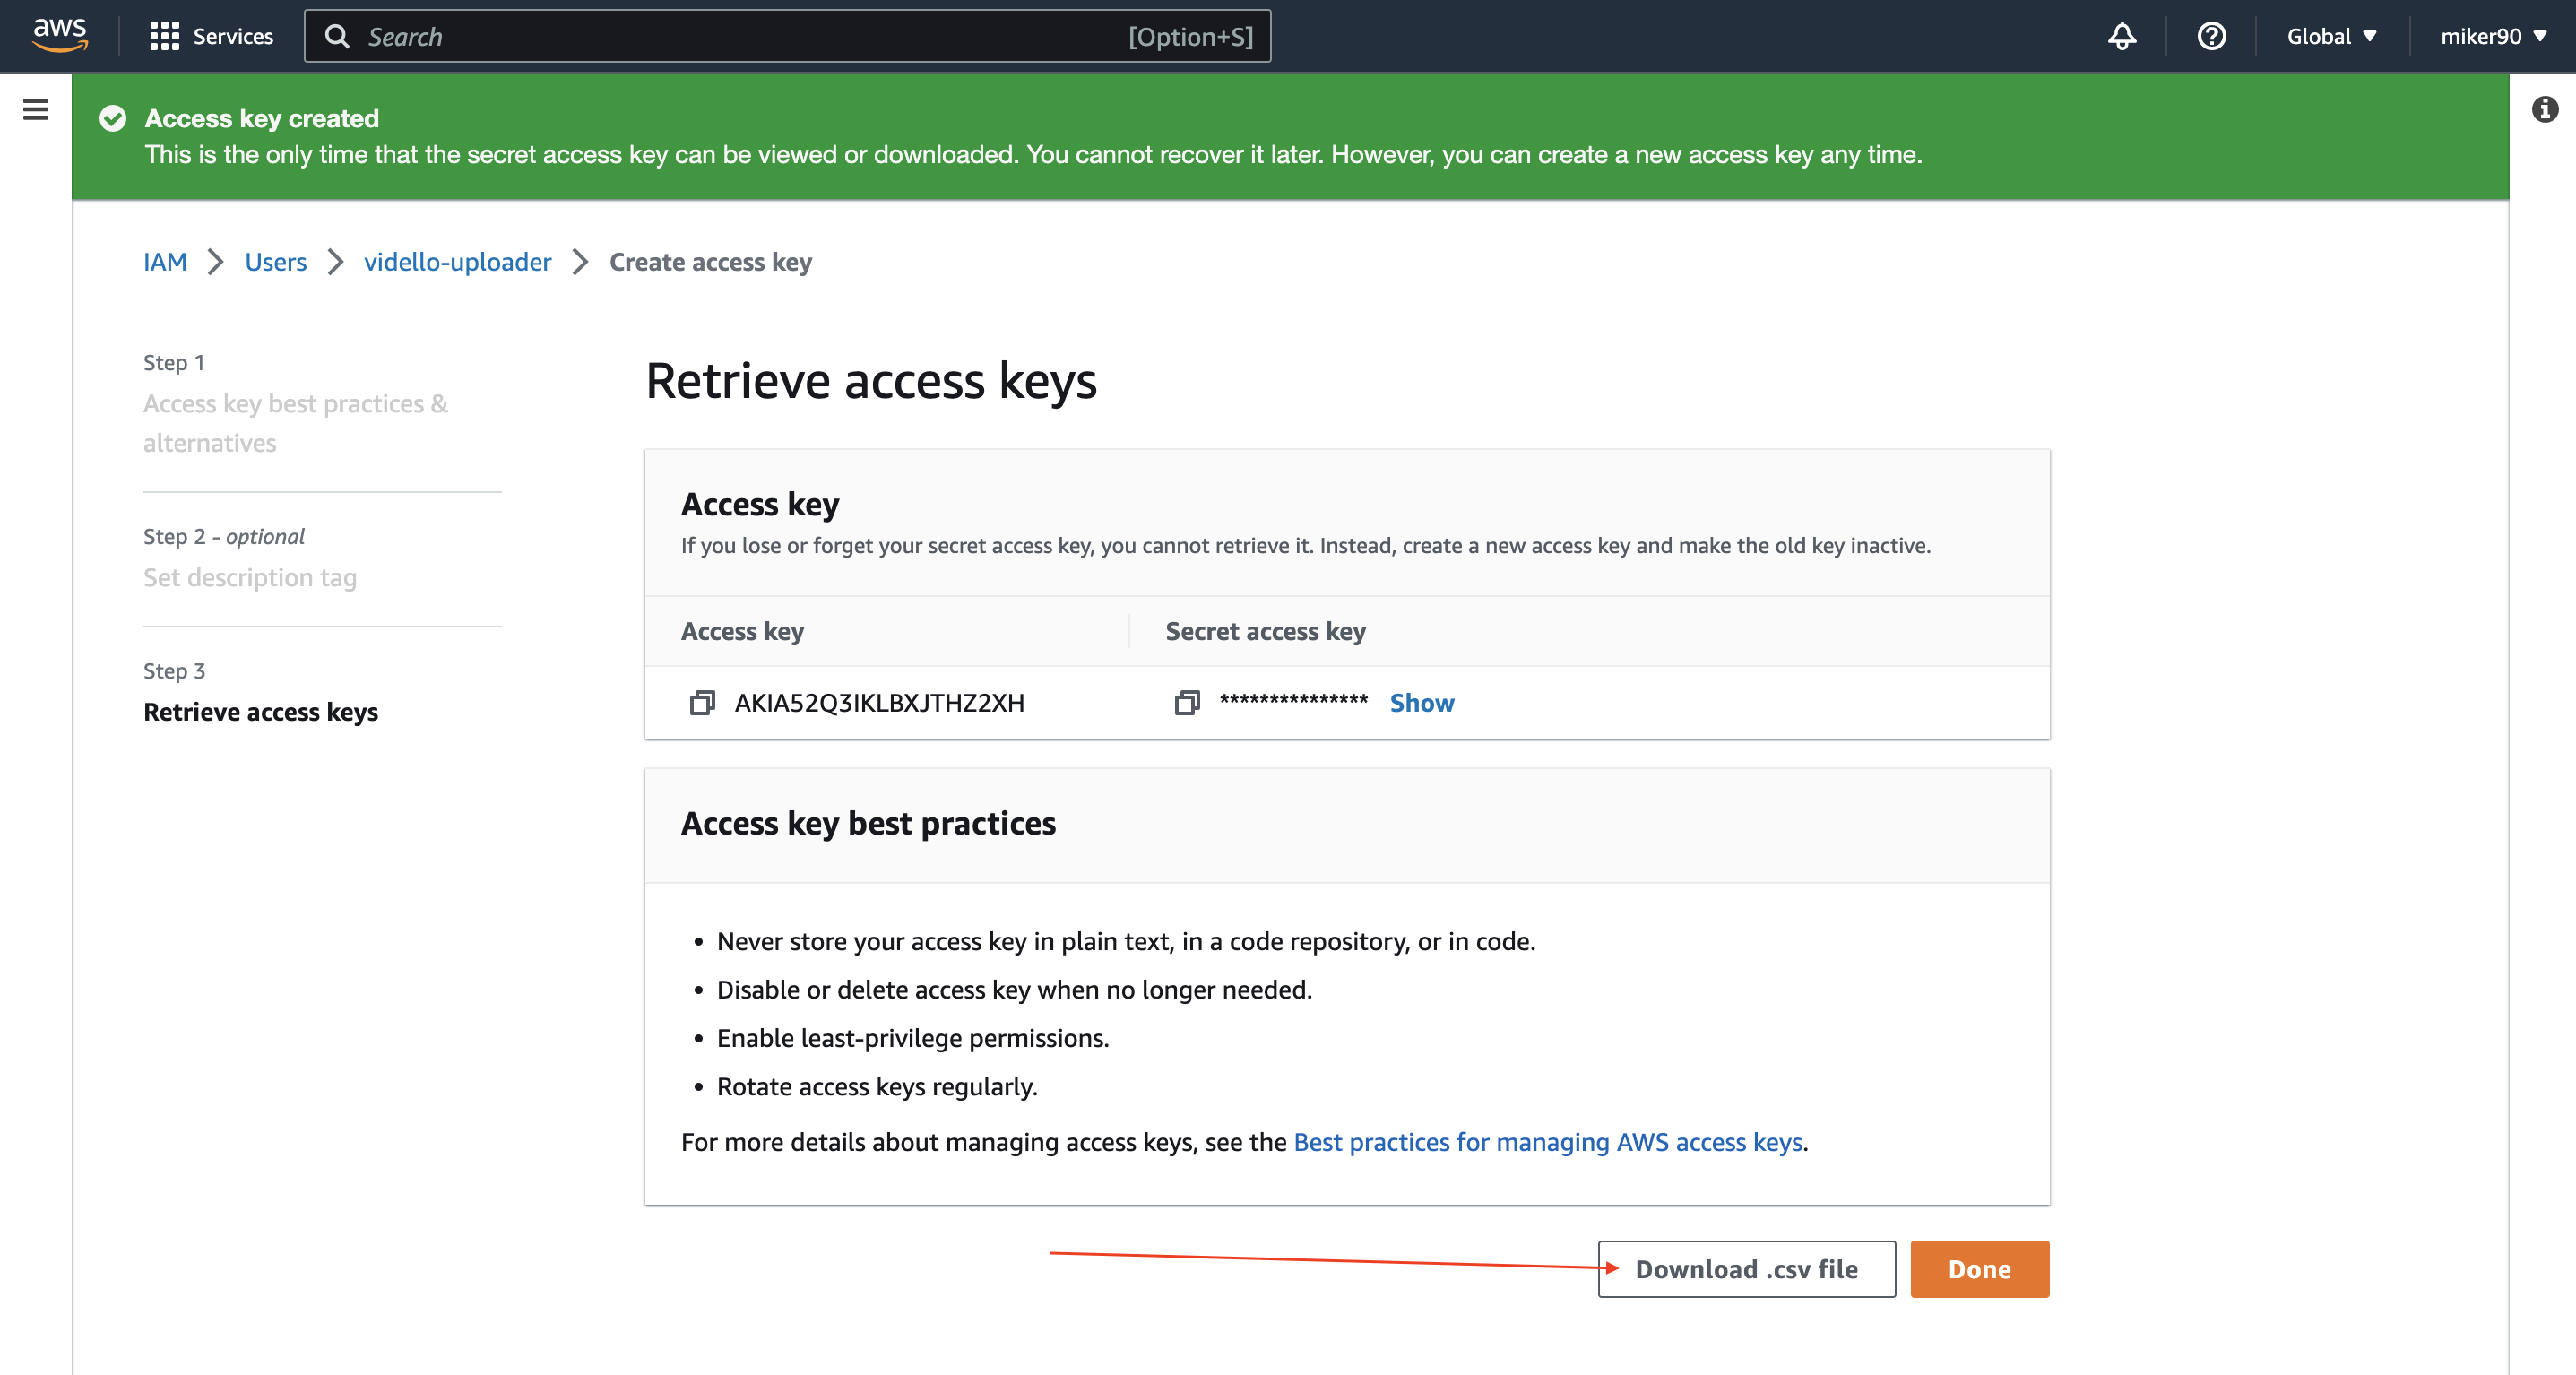
In next screen, click on "Create access key" (no need to fill up any details)
18)
Now, click on "Download .csv file" and that's it!
19)
Once you will create your first profile, or any other profile, you need to import this .csv file there!

Mira
Comments